
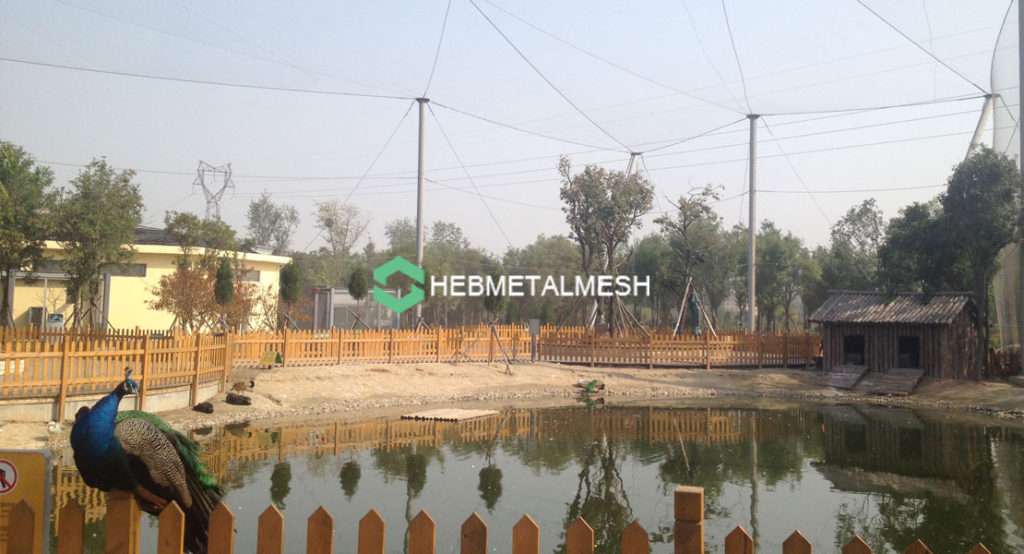
Executive Summary
An aviary net is the flexible skin that encloses a bird enclosure, and picking one comes down to four decisions: aperture, wire diameter, material grade, and finish. Match aperture to your smallest bird and wire diameter to your strongest beak. Choose 304 stainless inland and 316 within about 30 miles of salt water. Then install with a tensioned perimeter cable rather than staples, because tension is what keeps the net from sagging for the next 30 years. Measure your frame face by face, add 10% for trimming and tension allowance, and order made-to-size panels. Maintenance is simple: rinse quarterly, check turnbuckles yearly.
Need the Right Mesh for Your Birds? Get a Free Quote
Send us your bird species, enclosure size, and climate. We return a graded stainless steel mesh recommendation and a custom price within 24 hours.
Request My Free Quote →Key Takeaways
- Four decisions define an aviary net: aperture, wire diameter, grade, and finish.
- Size aperture to the smallest bird. Size wire diameter to the strongest beak.
- Use 304 stainless inland, 316 near the coast. Skip galvanized where parrots chew.
- A hand-woven net arrives as a diamond shape. It squares up only under tension.
- Never staple a net to timber. Run a perimeter cable and lace to it.
- Black oxide finish drops glare and makes the barrier nearly invisible from a distance.
- Maintenance is a quarterly rinse and an annual turnbuckle check. That is the whole program.
What an Aviary Net Actually Is
An aviary net is a flexible mesh skin, usually hand-woven from stainless steel cable. It hangs from a frame rather than standing on its own.
That flexibility is the point. When a bird strikes the barrier at speed, the net gives and returns the energy gently.
Rigid welded panels do the opposite. They stop the bird cold, and the bird absorbs the impact.
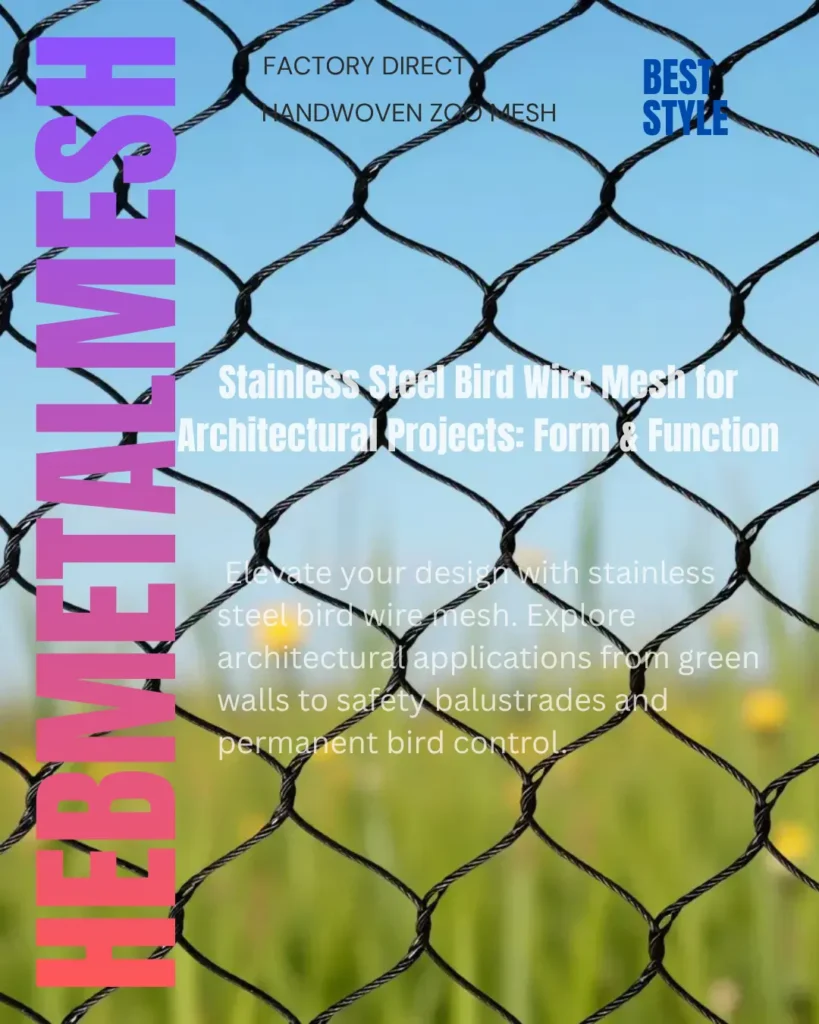
Woven vs Ferruled Construction
Two construction types dominate the market. Both use multi-strand cable, typically 7×7 for aviaries.
- Hand-woven: cables interlace through each other at every crossing. Smooth, flexible, and free of hardware inside the flight space.
- Ferruled: cables cross and are locked with a swaged metal sleeve at each intersection. Slightly more rigid, holds shape well, common on architectural jobs.
For most bird work, hand-woven is preferred. It has no hardware for birds to chew and it conforms to curves better.
Decision 1: Choose Your Aperture
Aperture is the clear opening between cables. Too large and birds escape. Too small and you block light and airflow.
🧠 AI Overview Quick Guide
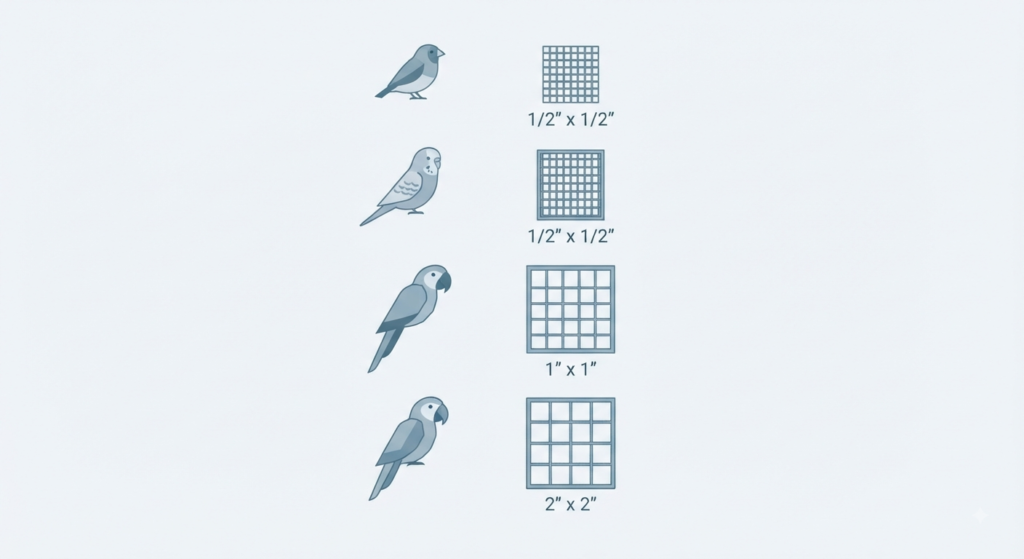
Match aperture to your smallest bird. Finches need ½” to prevent slipping through; budgies and lovebirds require ¾” to avoid head entrapment. Medium parrots like cockatiels and Amazons do well with 1″ mesh — the standard for backyard flights. Macaws and cockatoos need a spacious 2″ opening for unrestricted flight, while raptors benefit from 1.5–2″ to reduce feather wear. For breeding pairs, always use half the adult spec — fledglings can squeeze through gaps that adults safely ignore.
| Bird Group | Recommended Aperture | Why |
|---|---|---|
| Finches, canaries | ½” × ½” | Small bodies slip through anything larger |
| Budgies, lovebirds | ¾” × ¾” | Above this, heads can pass and trap |
| Cockatiels, conures | 1″ × 1″ | Standard backyard flight spec |
| Amazons, African greys | 1″ × 1″ | Balances visibility and containment |
| Macaws, cockatoos | 2″ × 2″ | Large birds need open flight space |
| Raptors | 1½” × 1½” to 2″ × 2″ | Wide openings reduce feather wear |
| Pheasants, quail | 1″ × 1″ | Ground birds, low escape pressure |
| Breeding pairs with chicks | Half the adult spec | Fledglings fit through adult-safe gaps Always size to the smallest resident |
⚡ Pro tip: For mixed collections, always size aperture to the smallest bird, then handle beak strength with wire diameter — not aperture.
For mixed collections, always size to the smallest resident. Then handle beak strength with wire diameter, not aperture.
Decision 2: Choose Your Wire Diameter
Wire diameter sets strength. It also sets how visible the net looks.
🧠 AI Overview Two key decisions
Match aperture to your smallest bird — finches need ½” to prevent slipping through; budgies require ¾” to avoid head entrapment; medium parrots do well with 1″ (the backyard standard); macaws and cockatoos need a spacious 2″ opening. For breeding pairs, always use half the adult spec.
Then choose wire diameter based on the strongest beak in your collection. Finches and softbills are fine with 1.2 mm (nearly invisible), while macaws and heavy chewers need 2.4 mm or even 3.2 mm. Heavier wire also adds snow-load capacity and visual presence.
2 Wire diameter guide
| Cable diameter | Imperial | Suits | Visual impact |
|---|---|---|---|
| 1.2 mm | 3/64″ | Finches, canaries, softbills | Nearly invisible |
| 1.6 mm | 1/16″ | Budgies, cockatiels, most parrots | Very low |
| 2.0 mm | 5/64″ | Amazons, greys, waterfowl, snow zones | Low |
| 2.4 mm | 3/32″ | Macaws, raptors, heavy snow load | Moderate |
| 3.2 mm | 1/8″ | Large macaws, mixed zoo exhibits | Noticeable |
🛠️ Don’t over-spec: a 2.4 mm cable on a finch aviary adds cost, weight, and makes the enclosure look heavy. Choose the lightest diameter that your strongest beak can’t damage.
A common beginner error is over-speccing diameter for small birds. A 2.4 mm cable on a finch aviary adds cost, adds weight, and makes the enclosure look heavy.
Decision 3: Choose Your Grade
Grade decides how long the net lasts in your climate.
- 304 stainless: the standard. Excellent corrosion resistance for inland and suburban sites. Best value for most buyers.
- 316 stainless: adds 2–3% molybdenum for chloride resistance. Use it within 30 miles of salt water, near pools, or in industrial air.
- Galvanized steel: cheaper, but zinc flakes cause heavy metal poisoning in chewing birds. Avoid for parrots.
- Plastic and nylon: UV degrades them in three to ten years, and any beak defeats them.
If you are unsure, buy 316. The premium is usually 15–25%, and it removes the question permanently.
Decision 4: Choose Your Finish
Two finishes cover almost every project.
Natural stainless is bright silver. It reflects light, which makes the net more visible to people and to birds.
Black oxide is a conversion coating grown on the steel surface. It does not flake, so it is safe to chew. It absorbs light rather than reflecting it, which makes the barrier disappear against dark foliage.
For display aviaries, choose black oxide. For utility flights where you want birds to see the boundary clearly, natural works fine.
For a wider comparison of finishes and wire types across cage styles, see our overview of mesh wire for bird cages.
How to Measure Your Aviary for Netting
Measure carefully. Most project delays start here.
- Sketch the enclosure from above and from the side. Number each face.
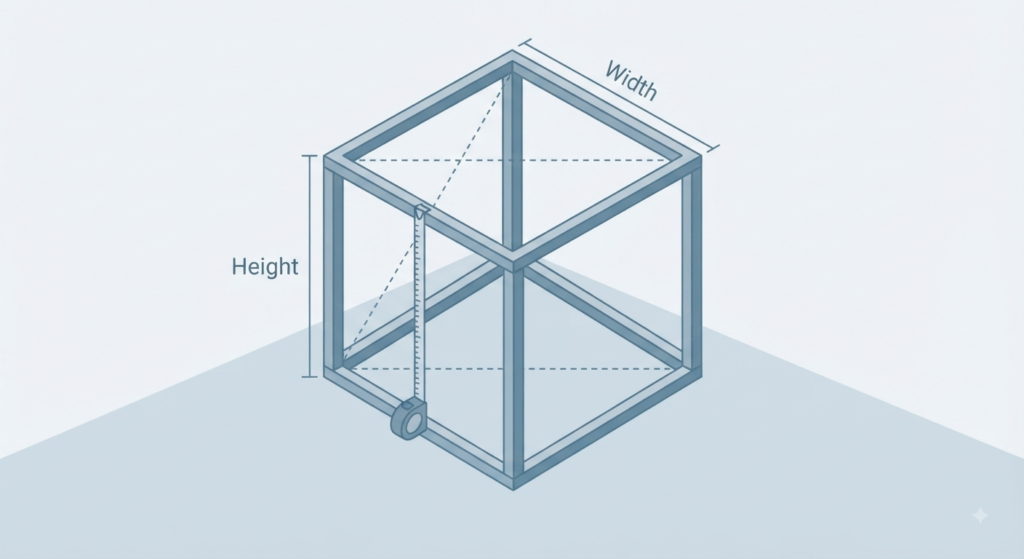
- Measure width and height of each face at the frame centerline.
- Measure the roof separately. Include the pitch length, not the flat footprint.
- Check diagonals on each face. A difference over 1% means the frame is out of square.
- Add each face area, then add 10% for tension allowance, seams, and trimming.
- Note which faces need doors, hatches, or removable sections.
Write the final cut list as a table with panel number, width, height, and aperture. Send that to the factory with your sketch.
Tools and Hardware You Will Need
🔧 Tools and Hardware You Will Need Installation
| Item | Purpose | Spec Note |
|---|---|---|
| Perimeter cable | Carries the net load around each face | 4–8 mm stainless, match grade |
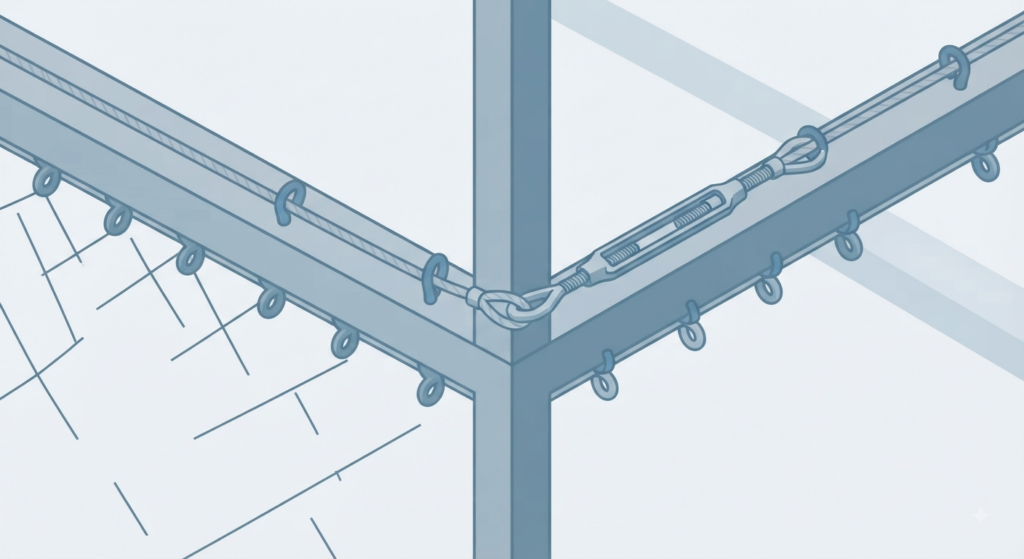
| Eye bolts | Anchor the perimeter cable to the frame | Space every 12–18 inches |
| Turnbuckles | Apply and adjust tension | One per corner, plus mid-run on long spans |
| Lacing wire | Attaches net edge to perimeter cable | 1.0–1.2 mm dead-soft stainless |
| Ferrules and swage tool | Terminates cable ends | Oval or figure-8 sleeves |
| Cable ties | Temporary positioning during hanging | UV-resistant, removed after lacing |
| Cable cutters | Clean cuts on stainless rope | Felco C7 or C9 class |
| Gloves and eye protection | Safety | Cut ends are sharp |
Everything metal must be the same grade family as the net. Mixing zinc-plated hardware with stainless mesh causes galvanic corrosion, and the fittings rust out within a year.
Installation: Five Phases
Phase 1: Prepare the Frame
Confirm the frame is square, plumb, and strong enough to take tension. A tensioned net pulls hard on corners.
Install eye bolts every 12 to 18 inches around each opening. Corner posts need heavier anchors than intermediate points.
Phase 2: Run the Perimeter Cable
Thread the stainless cable through every eye bolt around the face. Fit turnbuckles at the corners.
Leave the turnbuckles open, so you have full travel available later.
Phase 3: Hang the Net
Unroll the net on a clean tarp. It will look like a skewed diamond, which is normal.
Fix the two top corners first with cable ties. Then work down both sides, tying loosely every 12 inches. Do not tighten anything yet.
Step back and check that the diamond pattern runs consistently. Fix any twist now, because it is far harder later.
Phase 4: Lace the Edges
Thread lacing wire through each edge diamond and around the perimeter cable in a continuous spiral. Catch every diamond, not every second one.
Terminate both ends with a ferrule and swage it closed. Trim the tail and tuck it outward, away from the birds.
Phase 5: Tension and Finish
Tighten the turnbuckles evenly, working corner to corner. The diamond pattern will open and the corners will square up.
Stop when the net is firm but still springs slightly under hand pressure. Over-tensioning bows the frame inward and removes the impact protection.
Finally, remove all cable ties and run a gloved hand over every edge to find sharp ends.
Maintenance: What the 30-Year Program Looks Like
Stainless netting asks very little. Follow this and it will outlast the frame.
- Monthly: quick visual check for chewed spots, loose lacing, or debris buildup.
- Quarterly: rinse with a hose. Droppings are mildly acidic and should not sit for years.
- Twice yearly: wash shaded areas with mild soap and a soft brush to remove algae.
- Annually: check turnbuckle tension and re-tighten if the net shows belly sag.
- Annually: inspect every ferrule and lacing termination for movement.
- After storms: confirm posts are plumb and cables have not stretched.
Never use bleach or chlorine cleaners. They attack the passive layer and cause tea staining, especially on 304.
If light surface staining appears, a stainless wire brush followed by a rinse restores the finish. Do not use a carbon steel brush, because it leaves iron particles that rust.
What an Aviary Net Costs
Pricing depends on cable diameter, aperture, grade, and total area. As a rough planning figure, 304 hand-woven rope mesh runs $2.50 to $3.50 per square foot in mid-size quantities, and 316 runs 15–25% higher.
Three factors move the number:
- Aperture. Smaller openings use more cable per square foot, so 1/2″ mesh costs more than 2″ mesh at the same diameter.
- Cable diameter. Thicker cable means more steel.
- Order size. Unit price drops with area, and freight per square foot drops sharply on full pallets.
Custom panel sizes cost the same per square foot as stock rolls, because pricing is by rectangular area. Ordering made-to-size therefore saves money by cutting waste and on-site labor. Our bird cage netting guide covers how to build a cut list that keeps waste under 5%.
FAQs
What size aviary net do I need for my birds?
Match aperture to your smallest bird: 1/2″ for finches, 3/4″ for budgies, 1″ for most medium parrots, and 2″ for macaws. Then choose cable diameter based on the strongest beak in the collection rather than the average bird.
Can I staple an aviary net directly to a timber frame?
No. Staples create point loads that tear the net and they pull loose over time. Run a stainless perimeter cable through eye bolts and lace the net edge to that cable instead.
Why does my new net look crooked out of the bag?
Hand-woven rope mesh relaxes into a diamond shape when it is not under load. The corners reach 90 degrees only after you lace the edges and tighten the perimeter turnbuckles.
How do I clean a stainless steel aviary net?
Rinse with a hose every quarter and wash shaded areas with mild soap and a soft brush twice a year. Avoid bleach and chlorine products, since they damage the passive layer and cause brown tea staining.
Is black oxide finish safe for birds that chew?
Yes. Black oxide is a conversion layer grown on the steel itself rather than a paint or plating, so there is nothing to flake off and swallow. It also reduces glare, which lowers startle strikes.
How long should an aviary net last?
A properly specified and tensioned stainless net lasts 30 years or more with minimal upkeep. Most failures trace back to mixed-metal hardware, under-tensioning at install, or cut ends left uncapped.
Talk to an Aviary Mesh Engineer
Not sure about wire diameter or aperture? Our team helps zoos, breeders, and backyard keepers spec the safest, longest-lasting mesh.
Get Expert Help →