
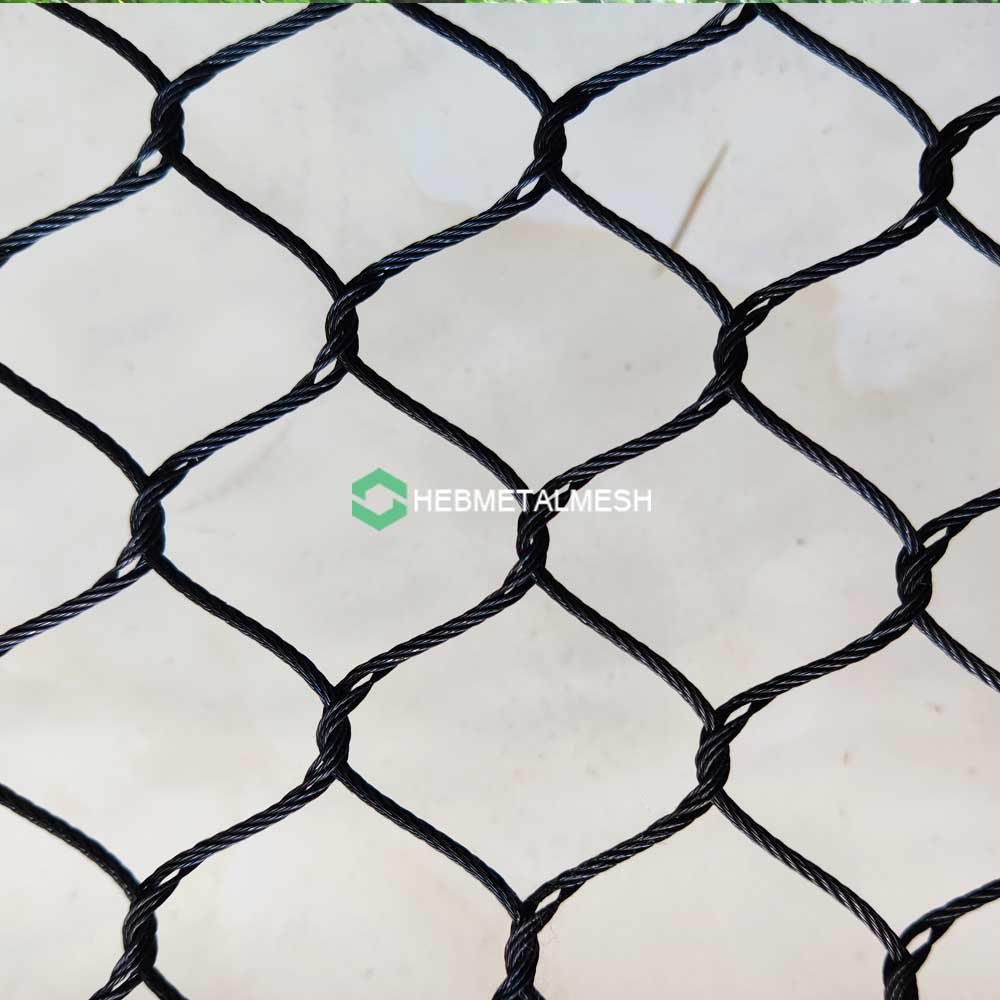
A mock-up panel is the cheapest test in a zoo mesh project, and the one most often skipped.
The failure pattern repeats. Drawings get approved, the order ships, the panels go up, and the first keeper walk-through turns up problems nobody priced.
A ferrule that a baboon can worry loose. Mesh bright enough to throw glare across every visitor photo. A fixing that needs a wrench nobody stocked.
None of that is a fabrication defect. Each one is a design assumption that never met an animal.
A zoo mesh mock-up panel puts the assumption in front of the animal while the answer is still cheap to change. It is a full-size section of the real mesh, on the real frame, at the real height, taking the real washdown. The cost stays small against the exhibit budget, and the saving is a re-order.
The tiers, the sizing, the trial and the sign-off follow.
Executive Summary
A zoo mesh mock-up panel is a full-size mesh section on production hardware, tested before the bulk order leaves the factory. It settles three things that drawings cannot: how the animal works on the mesh, how the fixing behaves under that load, and how the material reads and holds up in the exhibit’s own weather.
Run the tiers in order, from a swatch that fixes color and finish to a sample panel that puts the aperture in the keeper’s hand. The on-site mock-up then exposes the whole assembly to animals, washdown and visitors.
Approve the panel against written pass criteria, then carry those numbers into the purchase order. Without criteria the review becomes a debate about taste, and the loudest voice wins.
Quick Answer
A zoo mesh mock-up panel is a full-size section of the specified mesh, fixed to the specified frame with production hardware, mounted at exhibit height and left in place long enough for animals and keepers to work on it. Size it at one full bay or 2 m × 2 m, whichever is smaller, and place it on the harshest wall the exhibit has. Sign it off against written criteria for deflection, ferrule security, finish and sight lines.
Key Takeaways
- Three tiers of proof: swatch for color, sample panel for aperture, on-site mock-up for behavior and fixing.
- Build the mock-up from production parts. A panel assembled from shop leftovers tests nothing.
- Mount it where animals will actually reach it, not on a quiet service path.
- Log deflection, ferrule movement and surface damage on a fixed schedule, because memory is not a record.
- Write pass criteria before the trial opens, or the review turns into an argument about appearance.
- A failed mock-up is a cheap result. The same finding after fabrication is a re-order.
- Carry the approved numbers into the order and keep the panel on site as the reference build.
What a Mock-Up Panel Actually Proves
Drawings describe geometry. They say nothing about how a juvenile macaque probes a 50 mm gap, or whether a keeper can pull a cable clamp tight with one hand at shoulder height. Open area, wire brightness and fixing style all look fine on paper and read differently from 3 m away.
That gap between paper and animal is where mesh projects go sideways. A perfect spec sheet can still produce a panel that rattles in wind or photographs as a gray haze.
The panel answers those questions with evidence. It also gives the fabricator a physical reference, which matters more than any note on a drawing when the mesh is handwoven stainless steel animal enclosure mesh with variable ferrule spacing.
Three Tiers of Proof
| Asset | Size | What it settles | Signed by | Turnaround |
| Swatch | 100–200 mm square | Color, alloy, surface finish, wire texture in the hand | Designer, keeper lead | Days |
| Sample panel | 300–600 mm square, framed | Aperture and cable diameter at true scale, ferrule style, edge finish | Exhibit designer | 1–2 weeks |
| On-site mock-up | One bay, 2 m × 2 m minimum | Animal interaction, fixing under load, washdown survival, sight lines | Engineer, curator, keeper lead | 3–6 weeks |
Most projects stop at tier two and call it a mock-up. That works for a garden aviary, not for predator containment or any barrier the public stands against.
A wire rope mesh swatch comparison belongs early, before the design freezes. Two swatches on the same wall under the same light will show a color shift that no catalog photo ever reveals.
Mesh color sample for exhibit design decisions belongs on the wall, not in a binder. Sun angle changes it, and the first pick often arrives too bright.
Order the mesh sample pack once the shortlist is down to two. Aperture size and cable diameter arrive in the same box, and both read differently in a gloved hand than on a screen.
Sizing and Positioning the Mock-Up
Panel size drives what the trial can find. Too small and the animal never reaches the interesting part.
Zoo mesh mock-up panel size follows the frame, not the budget. Aim for one full bay, or 2 m × 2 m if the bays run larger, and include a corner and one edge cable termination. Corners and terminations carry the load path, and they show slack first.
How long a mesh mock-up should stay up depends on the question: a week answers fixing behavior, a month answers wear.
Mounting Height Matters More Than Area
Hang the panel at the height where contact happens. For climbing primates that band runs from 1 m to 2.5 m, and the bottom edge deserves attention because animals test it with their feet. For birds, include the top return where they hang and pick.
Mock-up mounting height for zoo exhibits should copy the finished condition, not a convenient working height. A panel bolted at waist level on a temporary post tells you nothing about a 6 m wall.
Choose the Worst Wall
Put the mock-up on the side that gets afternoon sun, prevailing rain, washdown overspray and the visitor crowd. That combination finds problems a shaded back-of-house test never will.
Frame stiffness has to match too. A mock-up frame that flexes differently from the permanent structure passes a deflection check the real wall would fail. Where the permanent frame is a modular fence panel system, build the mock-up from the same section.
Building the Mock-Up to Match Production
An on-site mock-up for animal enclosure mesh only transfers if it matches the order. Every substitution weakens the result.
Match the alloy first. Stainless steel 316 belongs on coastal sites and anywhere keepers use chlorine-based disinfectants, while 304 suits inland exhibits with mild washdown. Match the construction too, whether handwoven wire rope mesh or a welded grid, because the two behave differently under claw and tooth load.
Hardware Is Half the Test
Use the production clamp, tensioner, thimble and anchor. Record the torque you applied, because the next crew will ask.
Edge cable and terminations deserve their own attention. One termination shows whether the cable creeps after a week of animal load. The techniques in this guide to attaching wire mesh to metal frames apply directly, and the mock-up shows which one your crew can execute at height.
Running the Animal Trial
An animal trial panel before ordering mesh runs on the animals’ schedule. Do not fast-track the introduction to save a week, because a stressed animal behaves nothing like a settled one.
Watch the first 72 hours closely, then drop to daily checks. Early probe behavior predicts long-term wear better than any laboratory number.
What to Watch
Run the primate chew test on sample panel edges and ferrules, where teeth land first. Watch for hooking a finger through the aperture, hanging body weight on a single cable, and working the bottom edge with a foot.
Log four measurements on a fixed schedule:
- Mesh deflection check on trial panel at mid-span, pulled to a known load and measured with a straight edge and tape.
- Ferrule position against a paint-pen mark, checked for creep.
- Surface damage, photographed at the same distance each time.
- Noise, since a rattle under wind usually means a loose clamp rather than a slack panel.
| Check | Method | Pass criteria |
| Deflection | Pull to the design load at mid-panel, measure travel | Returns to within 5 mm of the starting position |
| Ferrule creep | Paint mark plus caliper reading | No movement after seven days of animal load |
| Fixing security | Torque wrench on a sample of clamps | Holds specified torque, no thread damage |
| Surface finish | Photograph under the same light | No staining, pitting or coating loss |
Accreditation bodies such as the World Association of Zoos and Aquariums push exhibits toward documented, reviewable decisions, and a mock-up log fits that habit well. It gives a curator something to sign that is not a promise.
Exposure, Cleaning and Hardware Checks
Animals test the mesh. Keepers and weather test everything else, and that half of the trial runs on a longer clock.
Wash the panel with the chemicals and pressure the husbandry team actually uses. Chlorinated disinfectants attack 304 in ways a rain test never shows, and a salt spray test on mesh sample stock will separate the two alloys in a week at a coastal site. The stainless rope mesh range in 304 and 316 covers both, so the trial is the cheapest place to learn which one your site needs.
Ferrule and Clamp Checks
Pull a spare ferrule to its rated breaking load and file the number with the approval documents. A ferrule pull test on mesh sample stock takes ten minutes and ends most arguments about cable quality.
Check clamps after each washdown cycle. Water sits in a clamp body, and a clamp that loosens under thermal cycling will not announce itself until a panel goes slack.
Sign-Off and the Order
Approve the panel against the criteria you wrote before the trial, not against impressions from the review meeting.
A mock-up approval checklist for zoo mesh keeps the review factual. Assemble the pack in this order:
- Signed criteria sheet with the pass limits.
- Trial log with dates, loads and measurements.
- Photographs at fixed distance, dated.
- Revised specification sheet with the approved aperture, cable diameter and alloy.
- Hardware schedule listing clamp type and torque.
- A note on anything that changed from the original drawing.
Then use that pack to convert a mock-up into a production order. The revised spec sheet becomes the order attachment, and the panel stays on site as the crew’s reference build.
What a Rejection Looks Like
Rejection is normal, and cheaper than the alternative. Send the panel back when you see:
- Ferrule creep past the paint mark within a week.
- Visible deflection that does not recover.
- Staining or pitting at clamp contact points.
- An aperture a keeper can push a finger through where visitors stand.
- Mesh that reads as a solid wall from the main viewing distance.
Rebuild with a larger cable diameter, a tighter aperture or a different alloy, then re-test the changed variable alone. Changing three at once leaves you guessing which one worked.
Once the panel clears, the zoo mesh installation sequence follows the same order the mock-up proved, which is the quiet benefit of building one.
FAQ
Three people, because each one sees a different failure. The keeper lead judges animal interaction, the designer judges appearance and sight lines, and the engineer signs the structural numbers. Collect all three signatures on one sheet so the approval carries a single date.
Sometimes, and only when the frame is permanent and the panel matches production exactly. Tag it in the drawing set so nobody cuts it out later. Where the frame is temporary, remove the panel, because a leftover section hides the seam lines.
The trial adds three to six weeks ahead of the purchase order, which sounds like a delay and usually is not. Run the trial while foundations and frame fabrication proceed, and the panel finishes around the time the frame is ready. Projects that skip it often lose the same weeks later, with freight already paid.
For a single garden aviary, a framed sample panel and clear photographs usually cover the risk. For predator containment, walk-through exhibits or any barrier the public leans on, build the full-size panel. The decision tracks exposure, not order value.
That is the finding, not a failure of the process. Photograph the damage, note where it started, and change one variable, whether aperture, cable diameter or alloy. A temporary trial enclosure mesh that survives a month of determined animals gives you a defensible specification.