
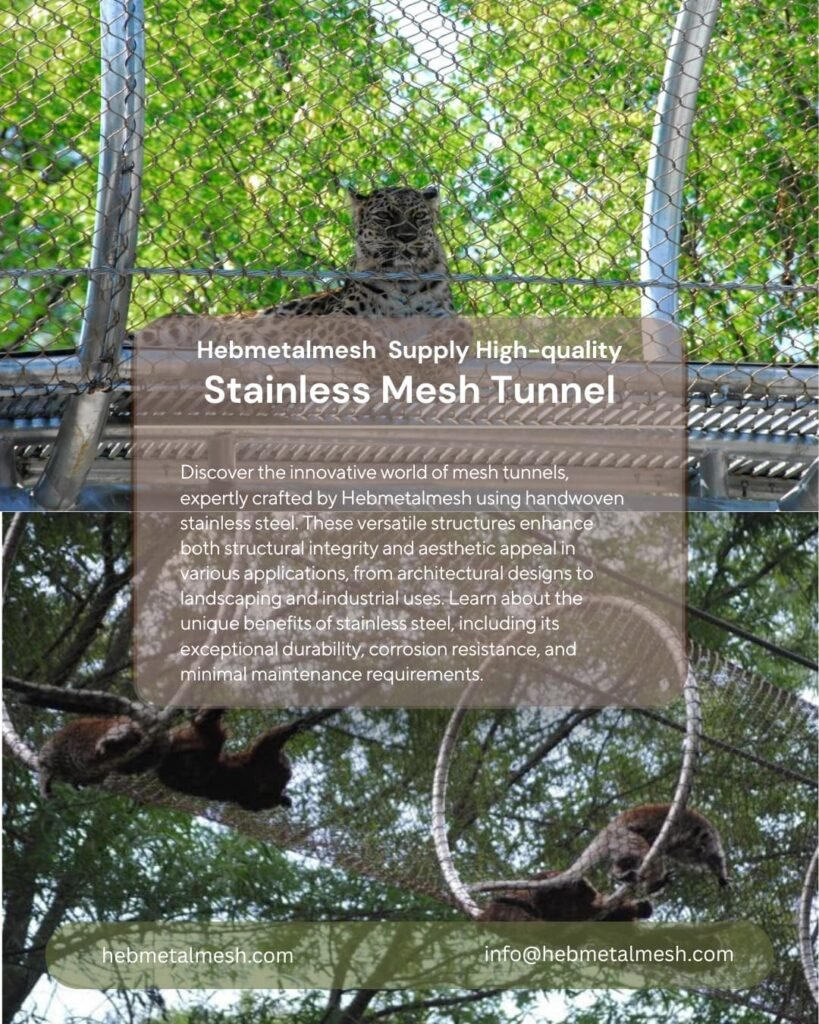
Executive Summary
A tunnel solves a problem every zoo faces. It moves an animal from one habitat to another without a crate, a truck, or a sedative. Animal transfer tunnel mesh turns that route into a permanent, low-stress corridor.
The mesh does the containment work. A steel frame does the structural work. Get the aperture and cable diameter right, and a tiger walks the same tunnel for twenty years without injury. Get them wrong, and you inherit entrapment, escape risk, or a tunnel your keepers cannot service.
This guide covers the decisions that matter: mesh size, cable diameter, span limits, framing, tensioning, junction sealing, installation order, and cost per square foot. It is written for zoo architects, facility managers, and keepers who have to sign off on the build.
Need a tunnel spec you can actually build from?
Send your span, species, and target aperture. We return a mesh specification, a frame layout, and a per-square-foot price — usually inside one business day.
Why a Tunnel Changes Animal Handling
Most zoos still move large animals with a crate and a truck. That works. It also costs a morning, a vet visit, and about a week of unsettled behavior afterward.
A tunnel takes the crate out of the routine. The animal walks a route it already knows, at its own pace, with no restraint and no loading ramp.
The same structure pays off on the keeper side. A keeper access tunnel mesh corridor lets staff reach a shift door or a feeding station without crossing an exhibit. That single change cuts risk on both sides of the barrier.
What the Tunnel Has to Do
A transfer tunnel is a containment structure first and a walkway second. It carries three loads at once: the animal’s impact, wind and snow on the span, and the pull of its own tensioned mesh.
That load case is why animal transfer tunnel mesh rarely uses the cheapest panel on the shelf. The mesh has to flex, recover, and hold its shape after a hit.
Handwoven wire rope mesh handles all three because it flexes. A welded panel dents and stays dented. A ferrule mesh panel bows under a charge from a big cat and springs back. Over a twenty-year service life, that difference decides the maintenance budget.
The mesh also has to look open. Solid walls stress animals in transit. A semi-transparent barrier keeps sightlines intact, so a cat sees the destination and keeps moving instead of turning back.
Zoo Tunnel Netting Mesh Size and Cable Diameter
Zoo tunnel netting mesh size is where most tunnel projects go wrong. The aperture has to stop an escape and still clear the animal’s head, toes, and horns.
Treat this as a starting range, then have your engineer confirm it against the species:
| Tunnel use | Aperture | Cable diameter | Support spacing |
| Primate transfer | 1″ x 1″ to 2″ x 2″ | 1/16″ – 3/32″ | 8 – 10 ft |
| Big cat corridor | 2″ x 2″ to 3″ x 3″ | 1/8″ | 10 – 12 ft |
| Aviary walk-through | 1″ x 1″ | 1/16″ | 8 – 10 ft |
| Ungulate and mixed | 2″ x 2″ to 3″ x 3″ | 3/32″ – 1/8″ | 10 – 12 ft |
| Keeper access | 1″ x 1″ to 2″ x 2″ | 3/32″ | 10 ft |
Two rules override the table. First, aperture size follows the smallest animal that will ever use the route, not the largest. Second, cable diameter follows the strongest animal, not the average one.
A 3/32″ cable in a 2″ x 2″ opening suits a primate transfer tunnel netting run. The same opening in 1/8″ cable suits a big cat transfer corridor mesh. That step from 3/32″ to 1/8″ looks small on paper and changes the impact rating a lot.
Framing, Tensioning, and Span
Mesh tunnel framing and tensioning decide whether the tunnel stays straight for a decade. Three frame types cover most builds:
- Hoop frames — rolled steel tube every 8 to 12 ft. Cheapest per foot, best for short runs.
- Truss frames — welded sections for long spans over public paths.
- Cable-suspended frames — for roofs and curved routes where steel tube cannot follow the line.
Tunnel netting span limits come from sag, not from mesh strength. A 3/32″ panel holds plenty of load, but it will dip between supports. Keep spacing inside the ranges above and add an intermediate hoop wherever the route turns.
Tension the mesh evenly across each panel. Uneven tension pulls the aperture out of square at the corners, and corners are exactly where animals test the barrier.
An elevated animal tunnel enclosure needs one more check. Confirm the anchor loads on the host structure before you hang anything. A tunnel tying two buildings together puts pull on both facades, and older walls may not have the capacity.
Keeper Access and Walk-Through Routes
A walk through aviary tunnel mesh route needs more headroom than an animal transfer chute netting run. Plan 7 ft clear at minimum, and 8 ft wherever visitors pass through.
Two details separate a good walk-through from a bad one:
- Double-door airlocks at both ends. Never a single gate.
- Kick plates at the base. Mesh alone wears through where boots and carts drag.
For a keeper access tunnel mesh corridor, run the same airlock logic. A keeper should never stand in an open tunnel with an animal at large behind them.
Light, Air, and What the Animal Sees
A tunnel with no daylight reads as a trap. Animals balk at a dark opening, and keepers work slower in one. Run a translucent roof panel, or a mesh roof over the full length, and the route stays bright without extra structure.
Airflow matters just as much on a sealed corridor. A tunnel joining two climate-controlled buildings needs louvres or a gap detail at each end, or it turns into a dead-air tube in summer. Plan that vent detail with the frame, not after it.
Keep the far end visible from the entry. An animal that can see where the tunnel goes will walk it. An animal facing a blank wall stops halfway, and you are back to a crate and a truck.
Species Notes
Primates. Climbing load governs the design, not impact. A primate transfer tunnel netting run needs anchors rated for a swinging adult, and no gap wider than the smallest infant in the group.
Big cats. Impact governs. A big cat transfer corridor mesh spec usually lands at 2″ x 2″ or 3″ x 3″ with 1/8″ cable. Add a roof panel even when the walls are solid.
Birds. A walk-through route wants a fine aperture and a dark finish. Black oxide cuts glare and keeps birds calmer in transit.
Mixed collections. When several species share one route, spec to the smallest and the strongest at the same time. That normally means a tighter aperture with a heavier cable, and the cost moves up with it.
Zoo Tunnel Mesh Installation Sequence
Zoo tunnel mesh installation runs in a fixed order. Skip a step and it usually shows up as a sag or a gap within a year.
- Set anchor plates and survey the line before any frame goes up.
- Erect hoop or truss frames and brace them against the run.
- Hang the mesh from the top edge first, then work down both sides.
- Tension in two passes — hand tight, then final — and check aperture square at every frame.
- Seal the junctions where the tunnel meets a building or an exhibit wall.
- Walk the full route with a keeper before the first animal goes through.
Step five earns its own paragraph. Gap sealing at junctions is where tunnels fail. A 2″ gap at a building face is an escape route for a small primate and a trap for a hoof. The detail work is the same as any boundary joint, and our guide to fence gap sealing covers the junctions that carry the load.
Tunnel Mesh Cost Per Square Foot
Tunnel mesh cost per square foot depends on five inputs. Only one of them is the mesh itself.
- Aperture — smaller openings use more wire per square foot
- Cable diameter — 1/8″ runs roughly a third more than 3/32″
- Span — longer spans need heavier frames, not heavier mesh
- Height and access — work at 20 ft costs more than work at ground level
- Hardware — tensioners, anchors, and airlock doors add up fast
A planning range for stainless steel tunnel mesh for zoos sits between $8 and $18 per square foot for material. Framing and labor often double that figure. Ask for a quote against your real span and species instead of accepting a flat per-foot rate.
Maintenance That Actually Happens
A tunnel gets inspected when someone walks it. Build that walk into the routine and the rest follows.
- Check aperture square at every frame each quarter.
- Look for broken ferrules at the corners, where load concentrates.
- Re-tension after the first winter, then every third year.
- Wash droppings off the lower panels before they pit the surface.
Stainless steel 304 handles most covered tunnels. Step up to 316 where the route sits near salt water or heavy cleaning chemicals.
Where the Tunnel Fits the Wider Plan
A mesh tunnel for zoo habitat connections only pays off when it links habitats that already share a back-of-house route. Plan it with the enclosure layout, not after it. Retrofitting a tunnel into a finished exhibit usually costs more than the mesh.
That is also where animal welfare gains show up. A calm transfer means fewer injuries, less sedation, and faster introductions. Tunnel netting for animal introductions shortens the adjustment period, because the animal meets its new group through mesh before it meets them on open ground.
Accreditation surveyors look at exactly this kind of handling design. The AZA accreditation standards are a useful reference for what they expect from a transfer route, and they tie handling directly to welfare outcomes.
Flexible tunnel netting for wildlife parks also earns a place in quarantine moves. A dedicated route between quarantine and a holding pen keeps a new arrival off the main exhibit path until clearance. That one corridor protects the collection and the wildlife conservation program behind it.
Species-appropriate mesh selection drives every choice above. Our guide to choosing the right fence for each animal breaks down aperture and cable by animal type. The predator enclosure mesh guide covers the high-impact end of that range.
For the structural side, attaching wire mesh to metal frames shows the fixing pattern that keeps tension even. Custom runs rarely match a standard panel, so custom-made enclosure mesh is usually the cheaper path once a route bends. The base product line sits on our animal enclosure mesh page, with aperture and cable options for zoo enclosure netting at every scale.
Key Takeaways
- Animal transfer tunnel mesh is a containment structure. Spec it like a barrier, not a walkway.
- Aperture follows the smallest animal on the route. Cable diameter follows the strongest.
- Support spacing controls sag more than cable size does.
- Seal the junctions at both ends. That is where escapes start.
- Budget $8 to $18 per square foot for mesh, then plan on doubling it for frame and labor.
- Re-tension after the first winter, then on a three-year cycle.
Get the tunnel right before the concrete goes in.
Send a sketch of your route and the species list. We will come back with the aperture, cable diameter, frame spacing, and a firm price — no guesswork on site.