
Most garden animal barriers fail for a reason that has nothing to do with the material they are made from: they were bought for the wrong part of the garden, against the wrong animal. A 1.2 m welded panel that turns a rabbit away is wasted money around a fruit tree, and the fine netting that keeps starlings off a seedbed will not slow a deer by a single step. Garden bed protection is a matching problem before it is a purchasing decision — read the damage, name the animal’s route in, and the barrier type selects itself. This guide applies the same method to a raised bed, an open vegetable patch, a fruit tree, an ornamental border and an allotment, and gives the one number each of them actually turns on.
Executive Summary
A garden barrier is specified by three things, and only three: what you are protecting, which animal is taking it, and how that animal gets in. Work in that order and the format, height and aperture follow almost mechanically; work in the reverse order and you buy a fence by appearance, then repair it by habit. Four entry routes cover nearly every garden failure — digging under, climbing or jumping over, pushing through, and reaching or flying in — and each one has a cheap counter-measure that belongs at the base or the top of the barrier rather than in the middle of it. Match the barrier to the zone, buy the tightest mesh aperture the crop can tolerate, and settle the ground line before you spend anything on extra height.
The reference specification is the garden netting product page.
Quick Answer:
Choose the barrier from the animal’s entry route, not from the crop. If the damage starts at ground level, the answer is a buried apron or a pegged skirt in stainless steel mesh; if the plants are stripped from above, it is an overhead exclusion netting panel; if whole plants are pulled out overnight, it is a taller barrier with a tighter mesh aperture. Set the aperture from the smallest animal you need to stop, set the cable diameter from the largest force you expect it to take, and treat height as the last variable rather than the first.
Key Takeaways
- Diagnose before you buy. Garden wildlife damage follows a pattern, and the pattern names the animal long before you see it.
- Aperture is set by the smallest animal, not the largest. A mesh sized for deer will pass a rabbit and every bird behind it.
- Buried apron beats extra height. Digging is the most common garden failure and the cheapest to prevent, at 300 to 600 mm of mesh turned outward at the base.
- Match the format to the exposure. Hand-woven rope mesh keeps its tension after a single wire failure; a welded grid does not.
- Protect the asset, not the boundary. Fencing a whole plot is costly, while raised bed protection over the beds that actually feed you is usually a fraction of the area.
Gardeners who want the regulatory and welfare picture behind barrier choice can read the guidance published by the Royal Horticultural Society, whose pest and wildlife advice is written for exactly this decision.
Read the Damage Before You Buy a Barrier
Damage is a record of behaviour, and the four common patterns point to four different animals and four different fixes. Soil thrown outward from beneath the line, with a clean tunnel mouth, is a digger — rabbit, mole or fox. Plants stripped of leaves and growing tips from 300 mm upward, with the stems left standing, is a browser reaching over the top. Whole seedlings gone, with the surface disturbed but no tunnel, is a bird or a small mammal walking in through the run of the mesh and finding it loose enough to push.
Where the pattern is unclear, the honest first step in garden damage prevention is a week of observation with the barrier temporarily pegged down at the base. Gardeners regularly spend two hundred on height to solve a problem that a ground detail worth twenty would have closed. Record where the damage starts — ground, middle or top — because that is the height at which the barrier is failing, and it is almost never the height people guess.
Match the Barrier to the Zone You Are Protecting
A garden is not one enclosure; it is half a dozen small ones with different values and different exposure. Specifying zone by zone is what keeps cost proportionate, and it is the step most buyers skip.
| Zone | What is at risk | Barrier role | The number that decides |
| Raised bed | Salad, herbs, root crops | Raised bed protection with a low hoop or frame | Height above the crop, 600–900 mm |
| Open vegetable patch | Leaf and brassica rows | Vegetable patch netting laid or framed | Mesh aperture, 20–25 mm |
| Fruit tree | Blossom, ripening fruit | Tree guard mesh on the trunk, net over the crown | Trunk guard height, 600–900 mm |
| Ornamental border | New shoots, bedding plants | Low discrete fence or cloche | Visibility and height |
| Allotment boundary | Everything, intermittently | Perimeter barrier plus gate detail | Height and buried apron |
A raised bed is the easiest zone to protect because the frame already exists to carry the mesh. Vegetable bed protection works on the same principle at ground level, while seedling protection is the one case where a fine mesh is worth the cost — the asset is small, tender and gone in a night. Note too that for fruit tree protection the threat is often bird pressure rather than ground animals, which changes the barrier from a fence into a cage.
The Numbers That Decide Whether a Barrier Works
Three numbers carry the specification. The first is mesh aperture, set by the smallest animal you must stop rather than the largest: 20 mm blocks small birds and voles, 25 mm handles most garden birds, and 38 mm is enough for pigeons and larger pests. The second is cable diameter, which is about force rather than size and rises with the weight pressing on the panel. The third is height, which for a browser at a garden boundary means jump height rather than fence height, because a deer clears a barrier that a person would call tall.
Because deer behave differently from every other garden animal, they are worth treating separately: a boundary built for them needs a specific combination of height, aperture and base detail, and the deer fencing guide sets out those figures. For everything else, the rule that survives is to design for the animal you cannot see, because a barrier that fails once will be tested at the same point every night afterwards.
Which Mesh Format Suits a Garden
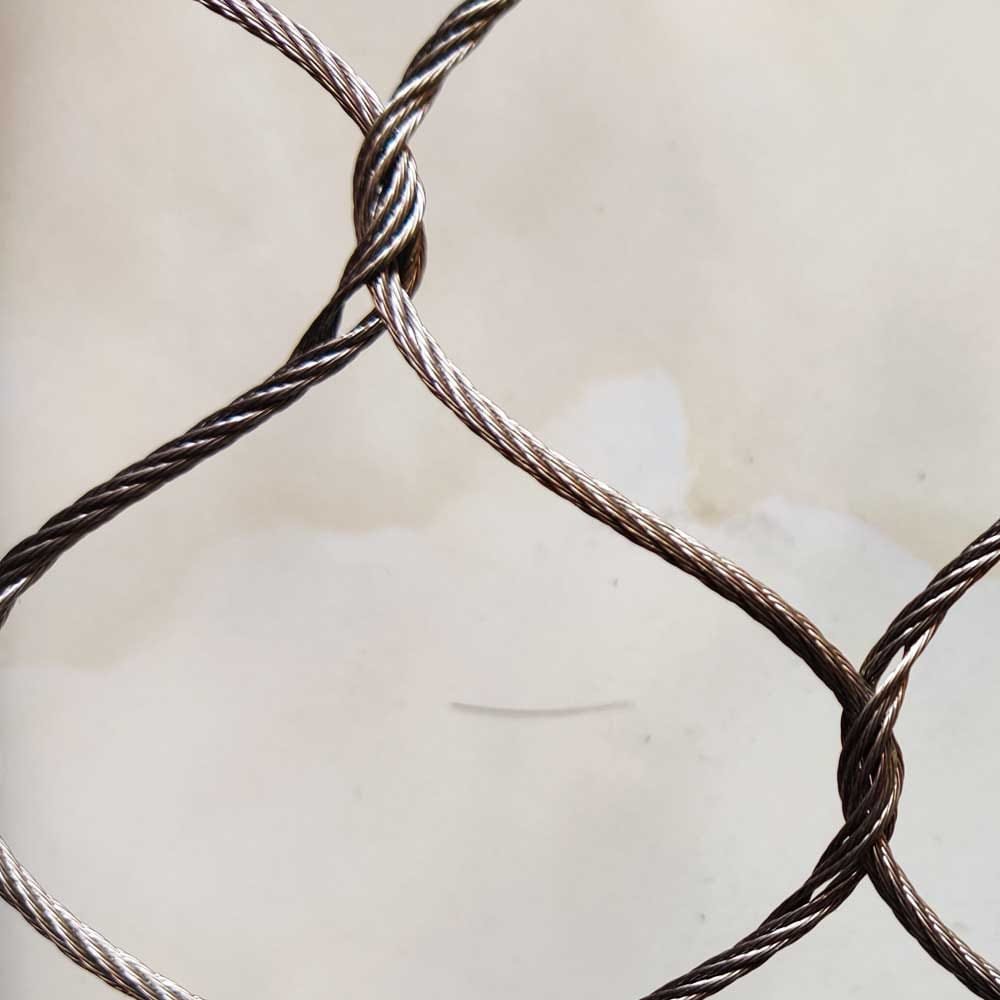
Three formats dominate garden work, and they fail in three different ways. A welded grid is cheap and dimensionally exact, but it fails at the fused intersection, where the coating is thinnest and rust begins. Chain-link is one continuous bent wire hooked to its neighbour, so a single break disturbs the diamonds either side of it and slackens the run. A hand-woven rope mesh is a textile — each strand is built from seven bundles of seven wires, so one broken wire costs a small fraction of that strand’s strength and the panel stays tensioned. That difference is the whole argument for garden exclusion mesh in stainless steel mesh, and it is why a rope mesh that costs more on the day is often the cheaper barrier across its service life.
Small pests decide the rest. Where a fine mesh is needed to keep insects or small birds out, the fine mesh garden netting benefits explain what that extra weave buys. Where two suppliers quote the same format at different prices, the netting material and supplier comparison lists the four fields to put side by side before deciding.
The Bottom 300 mm: Where Most Garden Barriers Fail
Stand at the base of a failing barrier and you will usually find the real problem. A buried apron of 300 to 600 mm turned outward from the line stops a digger without adding a millimetre of height, because an animal that starts to tunnel meets mesh lying flat in its path. On stony ground a pegged skirt does the same job on the surface, and on a hard surface a paved strip under the gate closes the gap where most garden animal damage begins and ends.
Where the ground is soft and the animal persistent, a stainless steel mesh with a heavier cable at the base is worth the extra, because that is the section that is worked at every night. Treat the base as a designed part of the barrier rather than a place where the mesh happens to stop, and garden wildlife damage in the same spot each season will stop repeating itself.
Birds, Fruit and Overhead Protection
Not every barrier starts at ground level. Where the loss is from above — buds taken from fruit trees, berries stripped before they colour, seedlings lifted from a seedbed — the answer is an overhead panel rather than a fence. Fixing an exclusion netting panel over the bed or fruit cage leaves the garden open at eye level while closing the route the birds actually use.
For bird pressure across a larger area, and for the frame and fixings that carry a roof panel, the bird netting system build guide covers the structure side. On an allotment, allotment netting over the most valuable beds is almost always a better return than allotment protection applied uniformly to the whole plot, because the pest pressure is concentrated on a few crops.
Cost, Service Life and the Order Checklist
Garden barriers are priced on area, and the price drivers run in a fixed order: cable diameter first, mesh aperture second, panel size third, and order volume a distant last. That is why a tight mesh over a single raised bed costs less than a coarse barrier around a whole plot, and why the cheapest way to reach wildlife exclusion garden performance is to reduce the area you protect. Fixings, edge cable, stakes and tensioners typically add 10 to 20 percent to a mesh-only figure, and they should be quoted in the same document rather than left as a contingency.
On service life, the format sets the ceiling and the exposure sets the rate. A stainless steel mesh in a coastal or heavily shaded garden will outlast the same mesh inland by decades; a galvanised grid will need recoating long before either reaches the end of its working life. Order in this sequence: state the zone, the animal and the entry route; give the length and height of the run; ask for the aperture and cable to be justified, not just stated; request panels or a roll, cut to size; and confirm the ground detail and fixing allowance in writing.
Materials for raised bed netting, raised bed mesh and heavier boundary runs are produced in stainless steel across the common aperture range, and the specifications sit alongside the reference product used throughout this guide.
FAQ
A buried apron. Rabbits dig under a barrier far more often than they climb it, so 300 to 600 mm of mesh turned outward at the base does more than adding half a metre of height. Combine it with a 25 mm aperture and a base detail in a heavier cable.
Not always, but it changes the ownership cost. A galvanised grid is cheaper on the day and needs recoating, while a stainless steel mesh costs more up front and holds tension for decades. For a raised bed you intend to keep in place, stainless is usually the lower-cost choice over the full term.
High enough to beat jump height for the animal concerned, and no higher. Height costs money along the whole run, while the base and the top detail solve most failures. Add height only when the damage pattern proves the animal is clearing the line.
Yes, and it is usually the smarter order of work. Start with the bed or tree that loses the most, specify it properly, and expand only if pressure moves elsewhere. A well-specified barrier over one bed outperforms a thin one around a plot.