
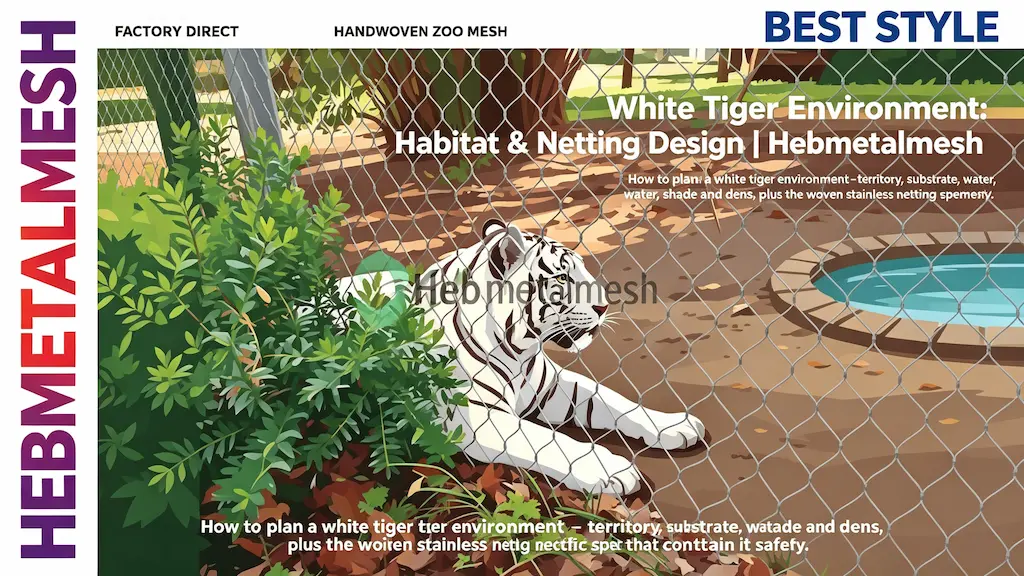
A tiger tests a barrier the way water tests a roof — continuously, at the weakest junction it can reach, with a body built for pulling things apart. A tiger control net is the part of a zoo barrier system that answers that behaviour. It decides where the animal can go, how close a visitor may stand, and what separates the two on the day a two-hundred-kilogram cat refuses to be contained politely. Below: the geometry, the load case, the cable schedule and the inspection routine for a barrier built to hold.
Executive Summary
A tiger control net is the secondary barrier in a big cat exhibit — a hand-woven stainless steel rope mesh layer standing between the primary containment fence and the public, or overhead where a vertical fence cannot be trusted alone. For tigers, lions and comparable carnivores the working specification is 3.2 mm cable at 38–76 mm aperture, on panels woven up to 9 m × 18 m so an exhibit runs on two or three pieces rather than twenty. SS304 is adequate inland; SS316 is the defensible choice within a few kilometres of salt water. Material plans at roughly $20–38 per square metre as a planning range, factory-direct lead time runs two to four weeks plus two to six weeks of transit, and every order should arrive with an EN 10204 3.1 mill certificate. The reference specification is the tiger enclosure fence and netting mesh product page.
Quick Answer:
What is a tiger control net, and what belongs in its specification? It is the barrier layer that manages the animal-and-visitor interface rather than containment alone, and five things must be written down: net height with any overhang, the inward standoff or secondary rail that keeps the public outside reach, cable diameter and ruling aperture, stainless grade supported by a mill certificate, and the fixing and tensioning method at every frame penetration. A specification that names only a fence height is unfinished.
Key Takeaways
- A control net solves the visitor interface. Containment and public safety are two duties with two different load cases and two different geometries.
- Height alone never holds a tiger. Plan the barrier as height plus overhang plus standoff, and treat the top edge as the part most likely to be tested.
- 3.2 mm cable at 38–51 mm aperture covers tigers. Take 76 mm only where visibility demands it, and never step the cable below 3.2 mm to pay for it.
- The net is a structural membrane. Every panel needs a perimeter cable, a tensioning method and a fixing detail drawn before fabrication.
- Inspect terminations, not the middle of the panel. Almost every failure begins within 300 mm of a ferrule or a frame fixing.
Barrier design guidance from accreditation bodies such as the Association of Zoos and Aquariums treats the public barrier and the animal barrier as two separate design obligations, which is why a control net is specified alongside primary containment rather than instead of it.
What a Control Net Adds Beyond Containment
Tiger escape netting and containment mesh answer one question: can the animal get out. A tiger control barrier answers a second, harder question: can a visitor get in, or be reached. The two duties fail differently. A containment fence fails when a cat climbs it. A control barrier fails when the gap between mesh and public stops being a gap — through the rake of a paw, a dropped camera, or food thrown across a moat.
The control layer also carries the working life of the collection: shift corridors, holding yards, transfer catches and vet crushes ride on the same mesh, and each puts a keeper briefly on the animal’s side of the line. Where a wall of hand woven rope mesh doubles as the public barrier, that net must be rated for the animal, not the crowd — the animal is the load. A tiger control net design therefore starts with a plan drawing marking the animal side, the keeper side and the public side, not with a product catalogue.
Barrier Geometry: Height, Overhang and Standoff
A tiger climbs from a standing start and climbs with purchase — claws, forelimbs, a body that hooks a top rail. A plain vertical line is the weakest shape available. Practical planning for a public-facing barrier runs to roughly 4.5–5 m of vertical net, or a lower wall of about 3.5 m with an inward overhang raked at about 45° and reaching roughly 1.2 m back over the enclosure. The overhang converts a climbing problem into a falling one: there is nothing above the animal’s reach to hold.
Where a tiger control fencing line follows a dry moat, the same arithmetic applies at the far lip, and the moat wall has to be smooth rather than stepped. The published tiger control net specification should state height, overhang angle, overhang reach, standoff distance and the clear radius at the base — in millimetres and degrees, not adjectives. Round the numbers up, then add margin; a barrier designed to the exact reach of a test animal will be beaten by a larger one.
Cable Diameter and Aperture: The Working Schedule
| Barrier role | Cable Ø | Aperture | Typical code | Breaking load |
| Primary big cat containment | 3.2 mm | 51 mm | HM3250 | ≈7 kN |
| Control / secondary barrier | 3.2 mm | 38 mm | HM3238 | ≈7 kN |
| Wide-aperture viewing panel | 3.2 mm | 76 mm | HM3276 | ≈7 kN |
| Smaller carnivore or holding run | 2.4 mm | 38 mm | HM2438 | ≈4.4 kN |
| Primate and medium mammal | 2.0 mm | 38 mm | HM2038 | — |
Aperture is a ruling dimension taken at the cross point, the diagonal opening between four adjacent ropes — not the pitch between parallel cables. Quote both side by side, or specify an aperture tolerance as well, because a mesh sold as 51 mm on one convention can measure 51 mm on the other and behave differently when a paw reaches through. Each rope is a 7 × 7 construction, forty-nine wires in a strand, which is what makes the mesh flexible and fatigue-tolerant instead of stiff and brittle.
A tiger control net panel is woven to the drawing at up to 9 m × 18 m, so most exhibits need a two- or three-panel layout and only a handful of joints. Fewer joints is not a cost trick; it is the largest reliability gain in the barrier. The full big cat schedule, including SS304 and SS316 cable options, sits on the tiger and big cat enclosure mesh product page.
The Load Case a Big Cat Barrier Must Survive
Design the tiger control mesh for the load the animal can deliver, not the load a person leans on it with. A tiger leaving the ground carries meaningful energy — a 200 kg animal at 5 m/s arrives with roughly 2,500 joules — and almost all of it has to go somewhere. A welded rigid panel resists at one point and yields there. A woven rope net deflects across its surface, shares the load along every rope meeting the cross point it struck, and returns.
That is why the mesh is not the component that gets sized. The breaking load of a single 3.2 mm rope is about 7 kN, generously above what one animal can apply to one strand, but the frame reaction is the number the engineer needs. The perimeter cable, the anchor plates and the posts carry the sum of the deflection; the softest element in the chain sets the outcome. Specify the net, then size the frame for the net.
The Visitor Interface: Sightlines and the Viewing Aperture
The persistent myth about a tiger viewing barrier is that it should disappear. It should not. Nobody is reassured by an invisible barrier at a tiger exhibit; the public reads safety from steel. What the mesh should do is stop interfering — no sagging bays, no rust streaks, no bright galvanised glare.
At 3.2 mm cable and 38 mm aperture the mesh reads as a light haze at distance, and the trick is to light the animal and darken the background rather than open the weave. The public-side layer is the tiger visitor barrier — a rail, a glass panel or a planted ha-ha — and the distance between it and the animal-side mesh is the tiger separation barrier proper. A standoff of roughly 4–5 m is common practice: it puts fingers, cameras and dropped food out of reach and gives keepers a working corridor without entering the enclosure. Treat the viewing window as a deliberate panel, never as an accident of where the frame landed.
Grade, Certificate and Coastal Exposure
SS304 at 18% chromium and 8% nickel handles inland sites, including humid and dusty ones. SS316 adds molybdenum and is the choice within a few kilometres of the coast, on sites with chlorine-laden wash-down, or wherever the barrier sits in marine air. Where a salt spray test result is offered, read the test duration and acceptance criterion rather than the headline claim.
The failure that catches people out is galvanic corrosion, not weathering. Stainless mesh fastened to mild-steel posts with carbon-steel bolts is a battery, and it will corrode at the fixing whether or not the net is perfect. Isolate dissimilar metals with nylon or PTFE washers, use stainless fasteners throughout, and never accept a grade claim without the EN 10204 3.1 certificate tying the heat number to the delivery. The same logic applies to a dedicated tiger control net schedule or a large mammal control net taken across a mixed carnivore collection.
Installation and Tensioning at the Control Barrier
A tiger control net installation is a rigging job, not a fence-erection job. Work in order: set and plumb the posts, run and anchor the perimeter cable, hang the panels, lace the joints, then apply cable tensioning evenly around the border until the bay is flat to the eye and dead to a tap. Each rope end closes in a swage ferrule, a cold-formed joint that is also the cheapest component on the order to substitute with a soft crimp — and the first thing to crack. Ask what the ferrule is made of, and how it is pressed.
Re-tighten once after four to six weeks of settlement, when the frame has taken its permanent set. Panels arrive as flat sheets or as rolls depending on span and access; where a long run is supplied in roll form, unroll along the frame rather than across it. On a first installation, the step-by-step zoo mesh installation guide is worth reading before the access equipment arrives, not after.
Inspection, Cost and Procurement
Inspect monthly from ground level and once a year with access. Look at the terminations: broken wires within 300 mm of a ferrule, cracks in the swage, rust staining suggesting a grade substitution, and every point where mesh rubs against steel. Rub points need a smooth sleeve, a radiused edge or a re-routed cable. A bay that has gone soft will flutter, and flutter fatigues the rope exactly where it enters the joint.
A tiger control net price is driven by cable diameter, aperture, panel size and grade, in that order; species names on the order do not change material cost. Plan a tiger control net cost at roughly $20–38 per square metre as a planning range, and remember that installed cost is dominated by the frame, posts and access equipment rather than the mesh. Before you commit, put any tiger control net supplier through the same questions you would ask a structural steel fabricator — mill certificate, ferrule specification, panel tolerance, inspection documentation — using this supplier vetting checklist. Two grades and one cable compare side by side in our SS304 versus SS316 breakdown.
FAQ
Containment keeps the animal inside the primary barrier. The control net is the secondary layer that manages the animal-and-visitor interface and gives keepers a working corridor. A serious big cat exhibit usually needs both.
Plan about 4.5–5 m for a vertical barrier, or roughly 3.5 m with a 45° inward overhang reaching about 1.2 m back. Height alone is the weakest option; the overhang and the standoff do as much of the work as the wall.
3.2 mm cable at 38–51 mm aperture. Move to 76 mm only where the viewing requirement justifies it, and never reduce the cable below 3.2 mm on a primary tiger barrier to compensate for the wider opening.
No. The animal-side layer is normally the net. The public side is often a rail, a glass panel or a planted ha-ha set 4–5 m back. The net holds the animal; the standoff holds the public.
Next Step
Send the exhibit plan, the species, the barrier height your site can build and your local wind exposure. We will return a panel layout, a cable and aperture schedule, the tensioning and fixing details for every frame penetration, and an indicative material budget. Request a quote and it will be with you inside one working day.