Introduction to Zoo Mesh and Its Importance
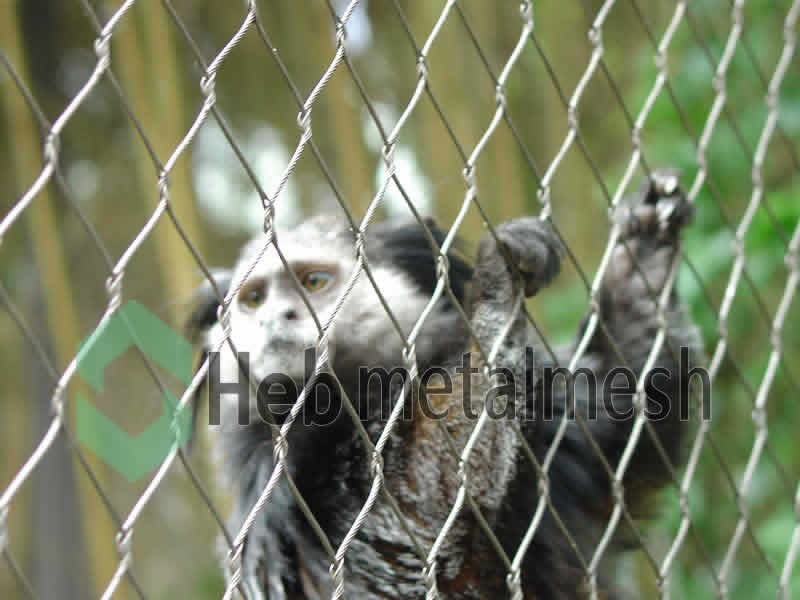
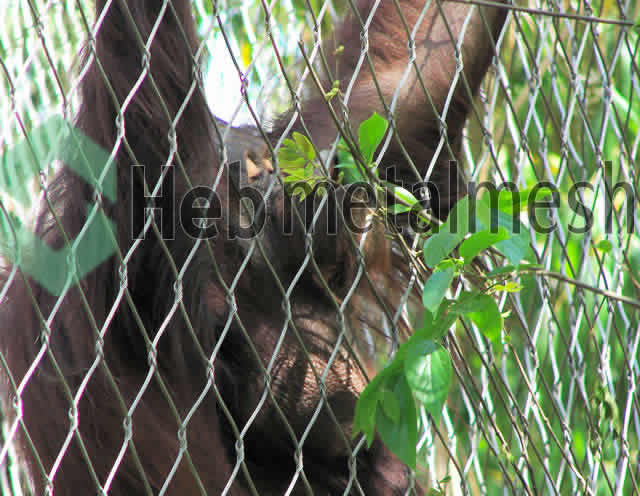
Zoo mesh is a specialized material designed to provide secure and protective enclosures for wildlife housed in captivity. It is typically made from high-strength steel or other durable materials, which offer several advantages over traditional fencing methods. This innovative mesh allows for a superior barrier that not only ensures the safety of animals but also promotes their comfort and well-being within the enclosure.
One of the primary functions of zoo mesh is to create an effective barrier that prevents animals from escaping while simultaneously deterring potential intruders. The strength of the material means that it can withstand significant physical stress, thereby reducing the risk of breakage and ensuring that the animals remain securely housed. This is particularly important in situations where animals may be more prone to escape, such as large predators or particularly agile species.
Moreover, zoo mesh contributes to the overall welfare of the animals by allowing for better visibility and airflow. Unlike solid barriers, zoo mesh enables both animals and visitors to see each other without the obstruction of solid walls. This transparency can help reduce stress levels in animals, as they are able to observe their environment while still being safely contained. Additionally, the open structure provides ventilation, helping to maintain a comfortable thermal environment for the inhabitants.
Essentially, the decision to install zoo mesh as part of an animal enclosure is critical in ensuring that the needs of both the animals and the visiting public are met effectively. By utilizing this high-quality material, wildlife facilities can significantly enhance the safety, comfort, and overall quality of life for animals in captivity, thereby fostering an environment conducive to their natural behaviors and patterns.
How to install zoo mesh, how to fix zoo mesh to frame – hebmetalmesh
Materials and Tools Required for Installation
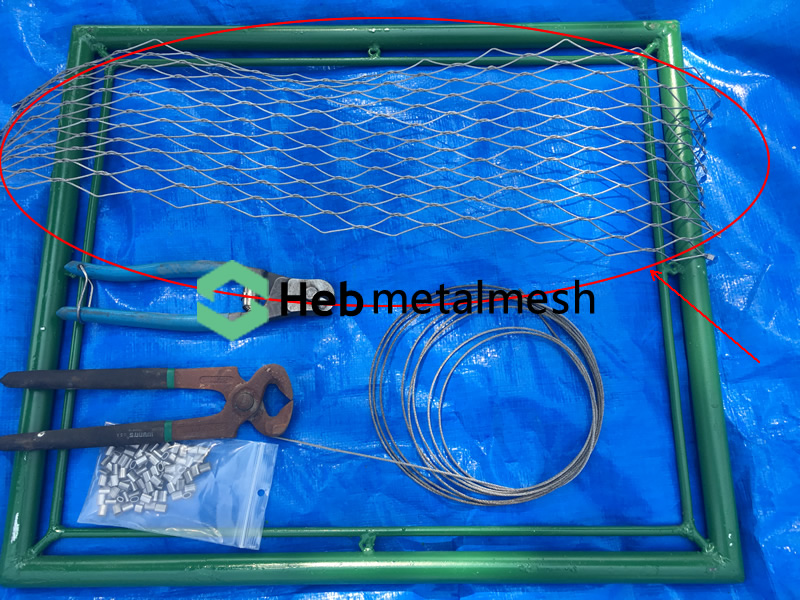
When planning to install zoo mesh to an enclosure frame, a carefully curated list of materials and tools is essential. This ensures a streamlined installation process and enhances the durability of the setup. Below is a comprehensive list of what is needed:
Firstly, you will need quality zoo mesh, specifically designed for animal enclosures. This mesh should be durable and rust-resistant, typically made from stainless steel or galvanized wire. The size and gauge of the mesh will depend on the species being housed, as different animals require varying levels of security and visibility.
Next, securing the mesh will involve the use of screws. Choose suitable screws that are compatible with both the enclosure frame and the type of zoo mesh you have selected. Stainless steel screws are ideal due to their resistance to corrosion, which extends the lifespan of your installation.
You will also need an appropriate frame for the enclosure. The frame should be constructed from sturdy materials, such as aluminum or heavy-duty steel, to support the zoo mesh effectively. Consider any specific design features required for the animals’ safety and comfort during your selection of framing materials.
In terms of tools, a drill is vital for creating holes in the frame where the screws will be installed. When installing zoo mesh, ensure you have a high-quality drill that can accommodate the size of screws chosen. Additionally, a measuring tape is essential for precise measurements, ensuring that the mesh fits correctly within the frame and that gaps are avoided.
Finally, cutters or snips will be necessary to trim the zoo mesh to the required dimensions. Investing in sharp and sturdy cutting tools can enhance the precision of your work and make the installation process more manageable.
Assembling the correct materials and tools is crucial for a successful installation. Proper preparation will lead to a safer and more effective habitat for your animals.
How to install zoo mesh, how to fix zoo mesh to frame – hebmetalmesh
Measuring the Enclosure Frame
When planning to install zoo mesh, the first and foremost step is to accurately measure the dimensions of the enclosure frame. This process is critical, as precise measurements ensure that the mesh fits securely and maintains the safety of the animals within the enclosure. To begin, gather essential tools such as a measuring tape, a level, and a notepad to record your findings. It is also useful to have a partner to assist in holding the tape in place for more accurate readings.
Start by measuring the height of the enclosure frame from the bottom to the top at several points to account for any potential settling that may have occurred over time. Record the tallest measurement, as this will be crucial for fitting the zoo mesh appropriately. Next, measure the width at different levels. Ensure to measure both the upper and lower sections since variations can occur due to the frame’s structural design.
It is equally important to measure the length of all sides of the enclosure frame. Take these measurements at both the top and bottom of each side, given that frames may not be perfectly straight. Multiple checks will help identify any discrepancies in lengths. Additionally, pay special attention to corners and angles; use a carpenter’s square to ensure that the corners are at a right angle wherever applicable. Adjust measurements accordingly to achieve an accurate fit for the installation.
Every detail counts in ensuring the zoo mesh will serve its purpose effectively. The more accurate your measurements are, the better the installation will be, ultimately enhancing the security and safety of the enclosure. This diligence will pay off when you move to the next stages of your project with confidence in the accuracy of your framework dimensions.
Preparing the Frame for Zoo Mesh
Before you begin the process to install zoo mesh, it is crucial to prepare the enclosure frame adequately. A well-prepared frame ensures that the installation is both effective and durable, providing a safe environment for the animals. The first step in this preparation process involves thorough cleaning of the frame. Remove any dirt, debris, or old materials that could interfere with the installation of the zoo mesh. This can be accomplished using a power washer or a simple scrub brush and soapy water, depending on the level of dirt accumulation.
Once the frame is clean, conduct a comprehensive inspection to assess its structural integrity. Check for any signs of rust, rot, or damage that may compromise the frame’s stability once the zoo mesh is installed. Pay particular attention to joints, connections, and load-bearing sections of the frame. Identifying and addressing any issues at this stage will save considerable time and effort later on.
If any structural weaknesses are discovered, it is essential to make the necessary repairs before proceeding. This may involve reinforcing joints with additional brackets or replacing any compromised sections of the frame. Utilizing materials that can withstand environmental conditions and stress is advisable to ensure the longevity of the frame.
Moreover, consider adding support beams in areas that may bear significant weight or strain. Reinforcing these weak points will ensure that the frame can withstand the tension created when you install zoo mesh. Additionally, ensure that the base of the frame is stable and even, as this will provide a strong foundation for the mesh installation. Following these steps not only prepares the frame effectively but also lays the groundwork for a successful installation of zoo mesh.
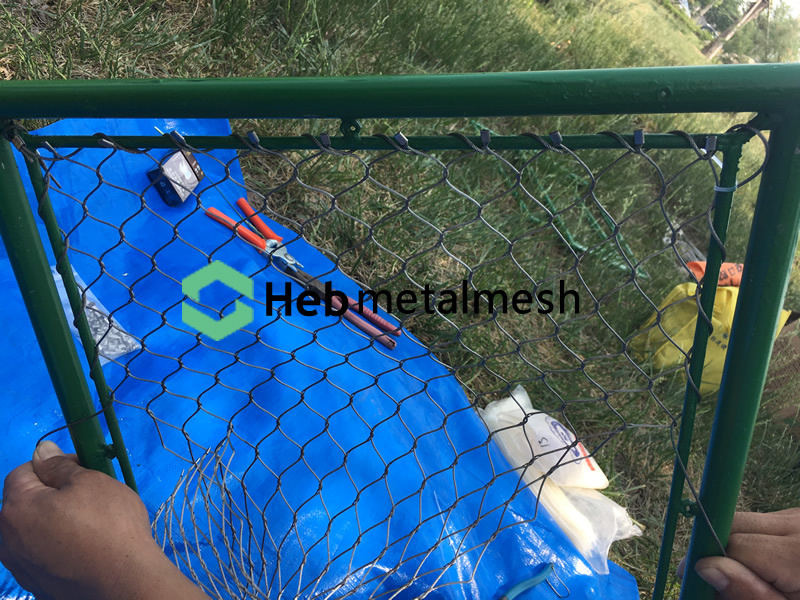
How to install zoo mesh, how to fix zoo mesh to frame – hebmetalmesh
Cutting the Zoo Mesh to Size
When undertaking the task of cutting zoo mesh to fit your enclosure frame, precision is critical to ensure both functionality and aesthetic integrity. The first step involves measuring the enclosure frame accurately. Utilize a reliable measuring tape to obtain the dimensions of each side of your frame, and it is advisable to make these measurements multiple times for validation. Document these measurements on a notepad to avoid any confusion during the cutting process.
In terms of safety, wearing protective gloves and safety goggles is highly recommended. Zoo mesh can have sharp edges that may pose a risk during handling, making personal protective equipment crucial. It is also advisable to perform the cutting in a well-ventilated area, especially if using power tools that may generate dust or small particles.
For cutting the zoo mesh efficiently, a combination of tools is beneficial. A pair of metal cutting scissors or heavy-duty tin snips can offer control for precise cuts, especially on the thinner types of mesh. If you prefer to work with thicker materials, a cutting tool such as an angle grinder equipped with a suitable blade can significantly simplify the task. Ensure the cutting tool is appropriate for the material thickness to prevent damage or bending.
When making your cuts, it is wise to account for extra material on each side. Allowing an additional half to one inch provides a margin for errors and adjustments once the zoo mesh is being installed. This kind of planning contributes to achieving a snug fit when you install zoo mesh onto the enclosure frame, ensuring it is secure and aesthetically pleasing. By adhering to these guidelines, you can successfully prepare the zoo mesh to perfectly meet your project’s specifications.
Attaching the Zoo Mesh to the Frame
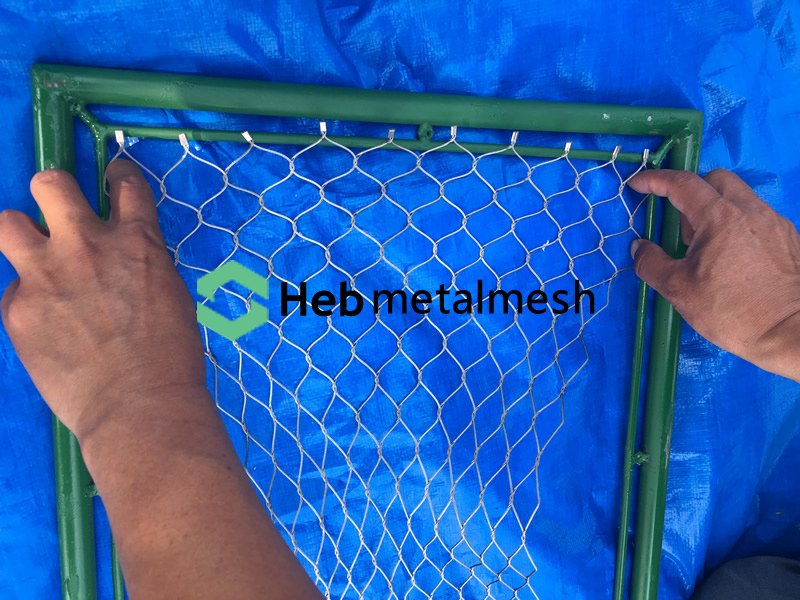
When it comes to securing zoo mesh to the enclosure frame, there are several reliable methods that one can employ. Each technique offers distinct advantages depending on the materials used, the design of the enclosure, and the specific requirements of the animal habitat.
One common method is to use screws, particularly when attaching the mesh to a wooden frame. Pre-drilled holes in both the mesh and the frame can facilitate efficient installation. It’s crucial to select screws made of corrosion-resistant materials to prevent deterioration over time. Be sure to place screws at regular intervals along the perimeter of the mesh for optimal stability. Utilizing a washer can help distribute the pressure, thereby reducing the chances of the mesh tearing.
Another option involves the use of specialized clips designed for fastening zoo mesh. These clips can provide a more straightforward installation process and can be particularly useful for metal frames. They are designed to securely grip the mesh without the need for drilling, thus preserving the integrity of the frame. Ensure that the clips are appropriately spaced to prevent any undue stress on the material.
A more permanent solution is welding the zoo mesh directly to metal frames. This technique requires skilled labor but can offer unmatched durability. For this method, both the mesh and the frame should be carefully prepared to ensure a strong bond. The benefits of this approach include increased resistance against tampering by animals and harsh environmental conditions.
Overall, regardless of the method chosen, ensuring a tight and secure attachment of zoo mesh to the enclosure frame is critical. Each fastening technique has its merits, and selecting the right one will largely depend on the specific circumstances of the installation. In conclusion, whether opting for screws, clips, or welding, careful attention to detail will ensure a robust and long-lasting installation of zoo mesh, enhancing the safety and security of the enclosed environment.
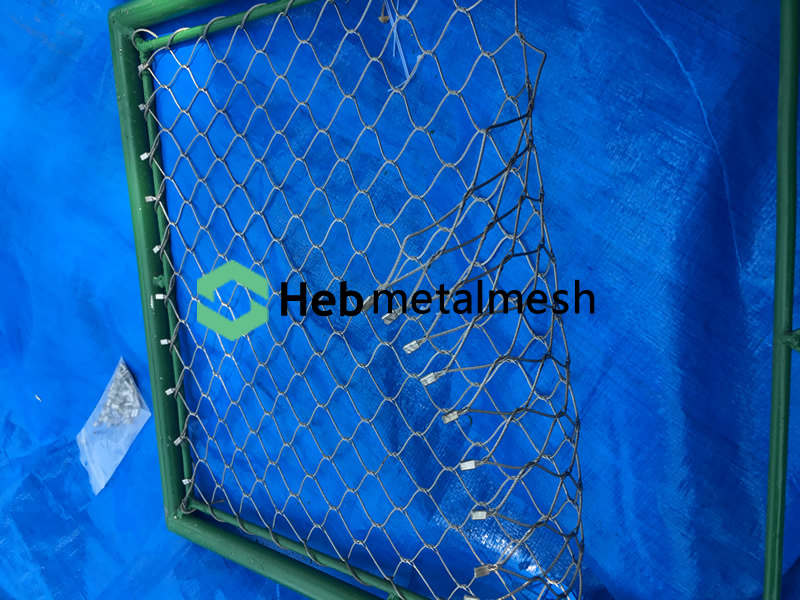
How to install zoo mesh, how to fix zoo mesh to frame – hebmetalmesh
Inspecting Installation for Safety and Durability
Once the process to install zoo mesh is complete, it is crucial to conduct a thorough inspection to ensure both safety and durability. An effective installation is not only about proper fitting but also about ensuring that the structure can withstand environmental pressures and the natural behaviors of the animals housed within. Begin the assessment by visually inspecting the entirety of the enclosure frame and the installed mesh to identify any visible flaws or signs of stress.
One key step is to check for any gaps that may have been left during the installation of the zoo mesh. These gaps can pose significant risks as they may enable animals to escape or create entry points for unwanted pests. Additionally, ensure that the mesh is securely attached to the frame without any loose ends or protruding edges that could lead to injuries.
Another critical aspect is checking the integrity of the frame itself. Inspect for rust, corrosion, or any damage that may compromise its strength. It is essential that the frame provides adequate support for the zoo mesh and can endure the weight and movement of the inhabitants. This inspection should also include assessing the mounting points where the mesh connects to the frame, verifying that fasteners and connectors are appropriately secured.
A comprehensive checklist is beneficial during this stage. Key items to include are examining the tightness of the mesh installation, assessing the condition of all structural components, and confirming that the mesh has not become frayed or damaged since installation. Once all safety measures have been verified and any necessary adjustments made, you can be more confident that your installation of zoo mesh meets industry standards and prioritizes the welfare of the animals.
Maintenance Tips for Zoo Mesh Enclosures
Maintaining zoo mesh enclosures is crucial for ensuring the safety and well-being of animals while extending the longevity of the installation. Regular inspections should be scheduled to check for any signs of wear or damage. This entails a thorough examination of the mesh fabric, attachment points, and the surrounding framework. Any frays, tears, or corrosion must be addressed immediately to prevent larger issues from arising. It is advisable to conduct these assessments at least twice a year, or more frequently in areas subject to extreme weather conditions or heavy usage.
Cleaning the zoo mesh is another vital aspect of upkeep. Organic materials, dirt, and debris can accumulate over time, potentially compromising both the aesthetic and functional aspects of the installation. To clean the mesh effectively, a mixture of mild soap and water can be employed. A soft-bristle brush may be necessary to scrub away stubborn deposits without risking damage to the mesh itself. Rinse thoroughly to eliminate any cleaning residue that could impact the mesh structure. Regular cleaning should be conducted at least once every few months, or as needed, depending on environmental conditions.
Developing a maintenance schedule tailored to the specific zoo mesh installation can be beneficial. This should include all inspection and cleaning activities as well as any additional repairs or replacement of sections as required. Utilizing a checklist can help to ensure that no vital steps are overlooked during maintenance. Additionally, facilities should keep records of all maintenance tasks performed, allowing for better planning and tracking of the mesh’s condition over time.
In conclusion, a well-maintained zoo mesh enclosure not only enhances the visual appeal of an animal habitat but also safeguards the welfare of the inhabitants. Regular inspections, cleaning procedures, and a comprehensive maintenance schedule can greatly contribute to the efficiency and durability of the zoo mesh installation.
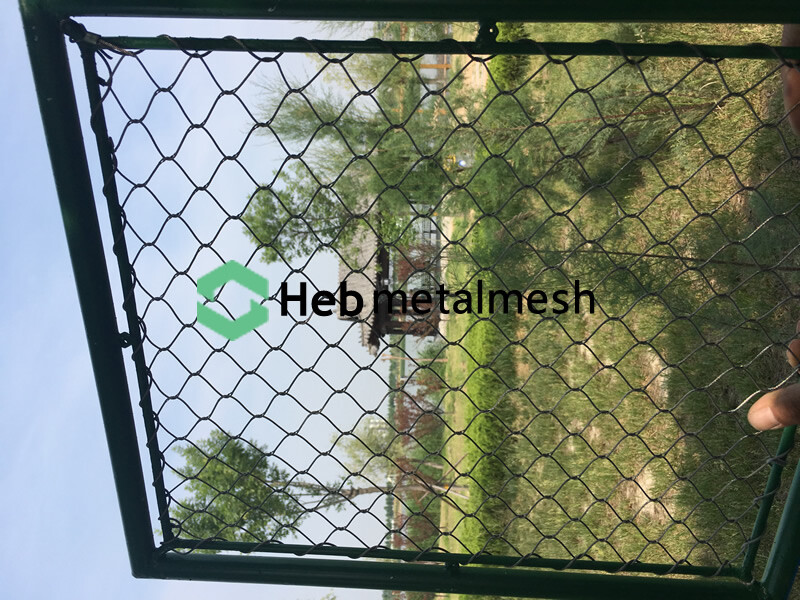
How to install zoo mesh, how to fix zoo mesh to frame – hebmetalmesh
Conclusion and Final Thoughts
In concluding our discussion on how to install zoo mesh to an enclosure frame, it is vital to acknowledge the critical role that proper installation plays in ensuring the safety and well-being of animals. Throughout this article, we examined the essential steps needed for a successful installation, emphasizing precision in measurements and alignment to prevent any safety hazards. The careful selection of materials was highlighted, indicating that durable and high-quality zoo mesh is crucial for maintaining the integrity of the enclosure.
Moreover, we explored various mounting and securing techniques which are indispensable for a stable setup. These methods not only guarantee the structural safety of the enclosure but also contribute to creating a suitable environment where animals can thrive. By ensuring that the zoo mesh is installed correctly, we can mitigate risks associated with escape or injury, thereby enhancing animal welfare.
Looking forward, there is room for innovation in enclosure design. As advancements in materials and construction techniques continue to evolve, the installation process of zoo mesh may become more efficient and user-friendly. As such, adopting new technologies, such as pre-fabricated panels or advanced fastening systems, could be beneficial for future enclosures. Furthermore, an emphasis on research into enrichment and behavioral needs will help guide further improvements in design, ensuring that the enclosures are not only secure but also conducive to the species’ natural behaviors.
Encouraging best practices in zoo mesh installation can lead to significant positive outcomes, both for the animals housed and for the organizations that care for them. By adhering to the guidelines discussed, professionals can contribute to a safe, enriching, and aesthetically pleasing environment that resonates with the necessity of modern animal care.
