
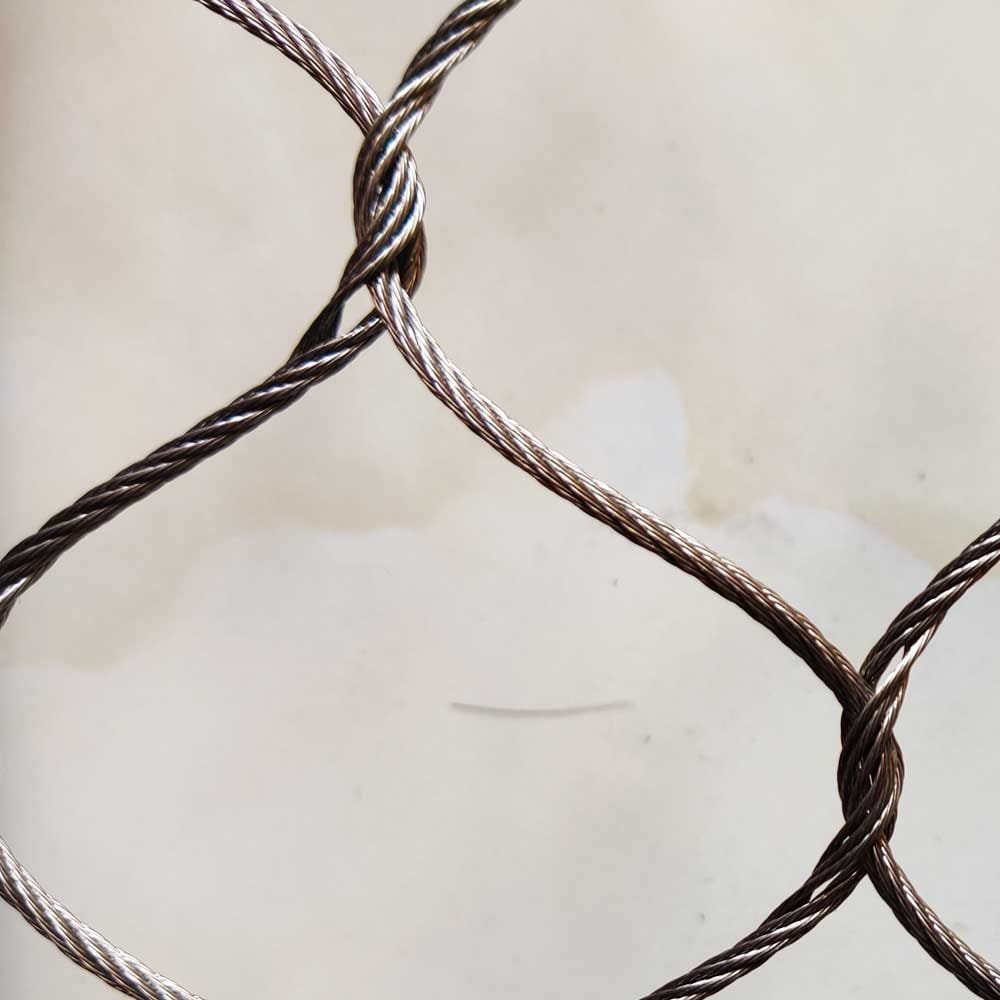
The crate lands on a Friday. Four panels, a coil of edge cable, a bag of turnbuckles, and a crew that has fitted chain link for fifteen years. By Monday the fence is up. By the following spring every panel has a belly in it that no amount of cranking will take out.
Nothing was installed wrong, exactly. The order was wrong. Tension went on before the concrete cured. The edge cable ran to a corner post with no brace behind it. Two ferrules were swaged from the wrong side and slipped under load.
Rope mesh is unforgiving that way. It has no rigidity of its own, so every load travels to the frame and the anchors. Get the sequence right and a panel sits dead flat for twenty years. Get it wrong and the fence tells you within one season.
Executive Summary
A rope mesh fencing installation depends on four things in order: footings that cure before load, posts spaced and braced for wind, edge cable tensioned from a fixed end, and ferrules swaged in a consistent direction. Skip one and the panel sags, ripples or creeps.
Two systems exist. Framed panels arrive welded or clamped and go up fast at 2.4 m spacing. Tensioned field panels ship as mesh plus edge cable and run to 3 m, which suits long boundaries and awkward shapes. Both need the same discipline at corners, gates and terminations, where most failures start. Budget the work honestly too: a two-person crew handles a residential run in a weekend, while anything above 2.5 m wants three people and a lift.
Send the Dimensions, Get a Panel Schedule
Give us the run length, height, post positions and slope. We return a panel schedule with aperture, cable size, edge cable length and the tensioning points marked.
Request a Panel ScheduleQuick Answer
Rope mesh fencing installation means setting posts and footings first, letting the concrete cure, then hanging mesh on a tensioned edge cable and pulling it flat with turnbuckles. Panels are never stapled or wrapped around posts. Tension goes on last, at one end only, after the frame is braced.
Key Takeaways
- Concrete must cure 24 to 48 hours before any tension goes on, or posts lean permanently.
- Tensioned panels run to 3 m post spacing; framed panels want 2.4 m because they carry more weight.
- Swage both ferrules from the same side, with the tail facing away from the load.
- Corner posts take double the load of a line post and need a brace, not just a deeper hole.
- A panel that deflects more than 25 mm under hand pressure at mid-span is still slack.
What a Rope Mesh Install Actually Involves
Rope mesh has no stiffness. A welded wire panel holds its own shape; a rope mesh panel holds whatever the frame and edge cable give it. That single fact drives every decision on site.
So the job is not “attach mesh to posts”. It is building a stiff perimeter, then pulling mesh into that perimeter until it stops moving. Aperture size, cable diameter and frame stiffness together decide how far it will move under wind.
Two systems do the work, and the choice changes the labor. Both come off the same animal fence mesh line, so one order can mix them.
| System | What arrives | Post spacing | Best for | Watch out for |
| Framed panels | Mesh laced or clamped into a welded frame | 2.4 m | Balconies, gates, short runs | Heavy; two people per panel |
| Tensioned field panels | Mesh roll, edge cable, turnbuckles | 3 m | Long runs, slopes, odd shapes | Tension sequence is unforgiving |
| Hybrid | Framed top rail with tensioned infill | 3 m | Fences over 3 m | Two trades, one schedule |
Framed units suit work at height, where a crew cannot pull tension comfortably. Tensioned panels win on long boundaries, because 3 m spacing cuts the post count by a fifth and the frame cost with it.
Inspect the delivery before you accept it. The receiving checks for netting orders cover aperture tolerance, cable diameter and ferrule count, and a short count stops the job dead on day two.
Survey and Layout Before You Dig
Measure the run twice, then measure the diagonals. A fence 40 mm out of square over 20 m shows it as a wave no tension will remove.
Mark post centers on a string line, then check that line against the building or boundary it must meet. If the run has to close on a fixed point, set that point first and work back.
Rope mesh on a slope
A rope mesh on a slope gives two options, and they look very different. Stepped posts keep every panel level and square, with mesh cut to each bay. A raked top follows the ground and needs a sloped edge cable.
Stepped is easier to tension and repair. Raked looks better on a long hillside and costs more, because every panel becomes a one-off. Decide before you order, since the panel schedule changes completely.
Posts, Footings and Wind
Post spacing for rope mesh fence comes from two numbers: panel weight and wind load on the projected area. Mesh passes most of its wind, so a 3 m tensioned run works in most residential and light commercial settings.
Wind load on mesh fence posts still matters at corners and at any solid element. A 2 m gate is a sail, and the posts either side must be sized for that gate, not for the mesh. Panel modules for tighter bays are covered in this guide to choosing a fence panel.
Rope mesh fence footing depth
Rope mesh fence footing depth runs 600 to 800 mm in firm soil and deeper in sand, fill or wet clay. Hole diameter should be at least three times the post width, so concrete forms a collar.
Set the post, brace it both ways, then pour. Leave the brace on for the full cure. Removing it early is the most common cause of a fence that leans by autumn. Twenty-four hours is a minimum cure, 48 is safer, and cold weather stretches both.
Edge Cable and Tensioning
The edge cable carries the load the mesh cannot. It runs the full perimeter through thimbles at each end and terminates in a turnbuckle at one end only, because two turnbuckles on one run fight each other.
Edge cable and turnbuckle setup
- Fix the dead end first: thimble, two ferrules, shackle to the anchor.
- Run the cable through the mesh border and around each corner, on the outside face.
- Fit the turnbuckle at the live end, wound out to two-thirds of its travel.
- Check the cable sits in every thimble groove before you load it.
Swaged ferrule direction
Swaged ferrule direction decides whether a termination holds. Swage from the same side every time, tail pointing away from the load, and use two ferrules rather than one long one.
A ferrule swaged from the wrong face leaves a lip that opens under vibration, and a fence that flexes in wind will find it. Ten millimetres of tail past the second ferrule gives you something to inspect later.
Tensioning stainless steel rope mesh
Tensioning stainless steel rope mesh is slow and even. Work in quarter turns and walk the panel between passes.
- Take up slack by hand until the mesh stops swinging.
- Quarter-turn the turnbuckle, then check the panel edge for straightness.
- Repeat until mid-span deflects about 25 mm under firm hand pressure.
- Compare diagonals; equal diagonals mean a square panel.
- Lock the turnbuckle and tape the setting.
Never use a lever or a winch. Over-tension crushes the aperture and work-hardens the cable at the ferrule, dropping the tensile strength of the assembly and its breaking load below the cable rating. The hardware supplied with these systems is rated as an assembly, so the number that matters covers cable, ferrule and anchor together.
Corners, Terminations and Gates
Corners are where rope mesh fencing fails, because that is where load concentrates. A corner post carries roughly twice the pull of a line post, from two directions at once.
Brace it. A diagonal to a deadman, or a back-stay to a sound structure, costs an hour and removes the failure mode. A deeper hole alone does not help, because the load is horizontal.
Rope mesh corner and end termination follows a fixed pattern: the cable turns on a thimble around the post, never on the post edge, and each leg tensions independently. On any barrier holding animals, that corner is also a containment point, and barrier standards published by the Association of Zoos and Aquariums are what most inspectors cite.
Rope mesh gate alignment
Rope mesh gate alignment starts before the gate arrives. Gate posts need their own footings, set deeper than line posts, and must not depend on mesh tension for stability.
Hang the gate, check the swing, then tension the adjoining panels. Do it the other way round and tension pulls the posts together until the gate binds at the latch.
Joining two rope mesh panels
Joining two rope mesh panels mid-run needs a shared post, not a laced seam. Lacing two panels directly creates a soft point that sags and chafes. Where a post is impossible, clamp a tension bar across both panels with a ferrule each side, then re-check it every year.
Anchoring to Walls and Existing Fences
Anchoring rope mesh to a masonry wall skips the posts, which makes it the cheapest metre on many sites. The load moves into the wall, so the wall becomes the structure.
Use wedge anchors at 600 mm centers with standoff brackets, and keep 40 mm clear so water drains behind the panel. On hollow block, use chemical anchors or a cast-in channel; a wedge anchor in a hollow core pulls out under tension. Within about 20 km of salt water, specify 316 stainless steel for cable and fittings.
A rope mesh install over an existing fence works when the old frame is sound. Check post condition, anchor corrosion and plumb before reusing anything. The standoff detailing used on mesh railings transfers directly to this kind of edge fixing.
What Goes Wrong in Year One
Most complaints trace to four causes, and all four show up in the first season.
- Sag along the top edge. Cable tensioned before the concrete cured, or a corner post that moved.
- One loose ferrule. Wrong swage direction, or one ferrule instead of two.
- Rust at a fixing. A galvanized bracket against stainless cable sets up galvanic corrosion in wet weather.
- Panels out of square. Diagonals were never checked, so the aperture reads as a diamond.
A short handover inspection catches all of them. Walk the run, push every panel at mid-span, and check each ferrule by eye. The inspection points used for aviary panels apply to any rope mesh fence.
Cost, Crew and Timing
Rope mesh fencing installation cost splits into panel, frame and labor, and labor is the part that surprises people. A straightforward run at ground level takes about a third of a day per 10 m for two people. Height, slopes and gates push that up.
DIY versus contractor for mesh fence comes down to height and tension. Below 2.5 m on flat ground, a careful two-person crew can manage with hand tools. Above that, or anywhere a lift is needed, the crew and insurance cost more than the saving.
Order early. Panels ship crated and freight books by volume, so a five-week lead time becomes eight in a busy season.
Tools for rope mesh installation are modest: a level, a string line, a torque wrench, a swaging tool or press, cable cutters, and two spanners. Add a laser for long runs and a tower for anything over 3 m.
FAQ
Tension alone will not hold it. Rope mesh needs a stiff perimeter, either a welded or bolted frame, or a post-and-edge-cable system anchored at both ends. Mesh tensioned between two flimsy points pulls them together.
Yes, if the posts are sound and the frame is plumb. Strip the old fabric, check for corrosion at the footings, and confirm post spacing against your panel schedule. Old frames often sit at 3 m centers, which suits tensioned mesh but not framed panels.
The posts move, and they stay moved. Green concrete has no grip on the post, so the pull walks it out of plumb. Pull the braces, reset the posts and start again; no adjustment fixes a leaning corner.
Add an intermediate tension point. On runs over about 20 m, fit a tension bar or an anchor post mid-span so the cable loads from both directions. One long cable between two distant anchors always finds a belly.
For 3 mm cable, a good hand swager with the correct die makes a sound termination. At 4 mm and above, use a hydraulic press and check the swage against the die chart. An undersized swage looks fine and fails under load.
Get the Sequence Right the First Time
Send your run length, post positions and slope. We return a panel schedule with edge cable lengths, tension points and a hardware list, so the crew is not guessing on site.
Get My Panel Schedule